Get Help
There is a wealth of support online for R and RStudio. In your browser search bar, prefix your question with “R” to eliminate answers for other programming languages. For example “R create new database” as a search string leads quickly to this site: SQL databases and R.
There are many tutorials online for R and RStudio. For example, search for “R Getting Started” and you will likely find Tutorial Getting Started with R and RStudio.
If you are looking for the official definition of some R function, then add the word “documentation” to your search. For example, “R dbCreateTable documentation” will help you find dbCreateTable: Create a table in the database.
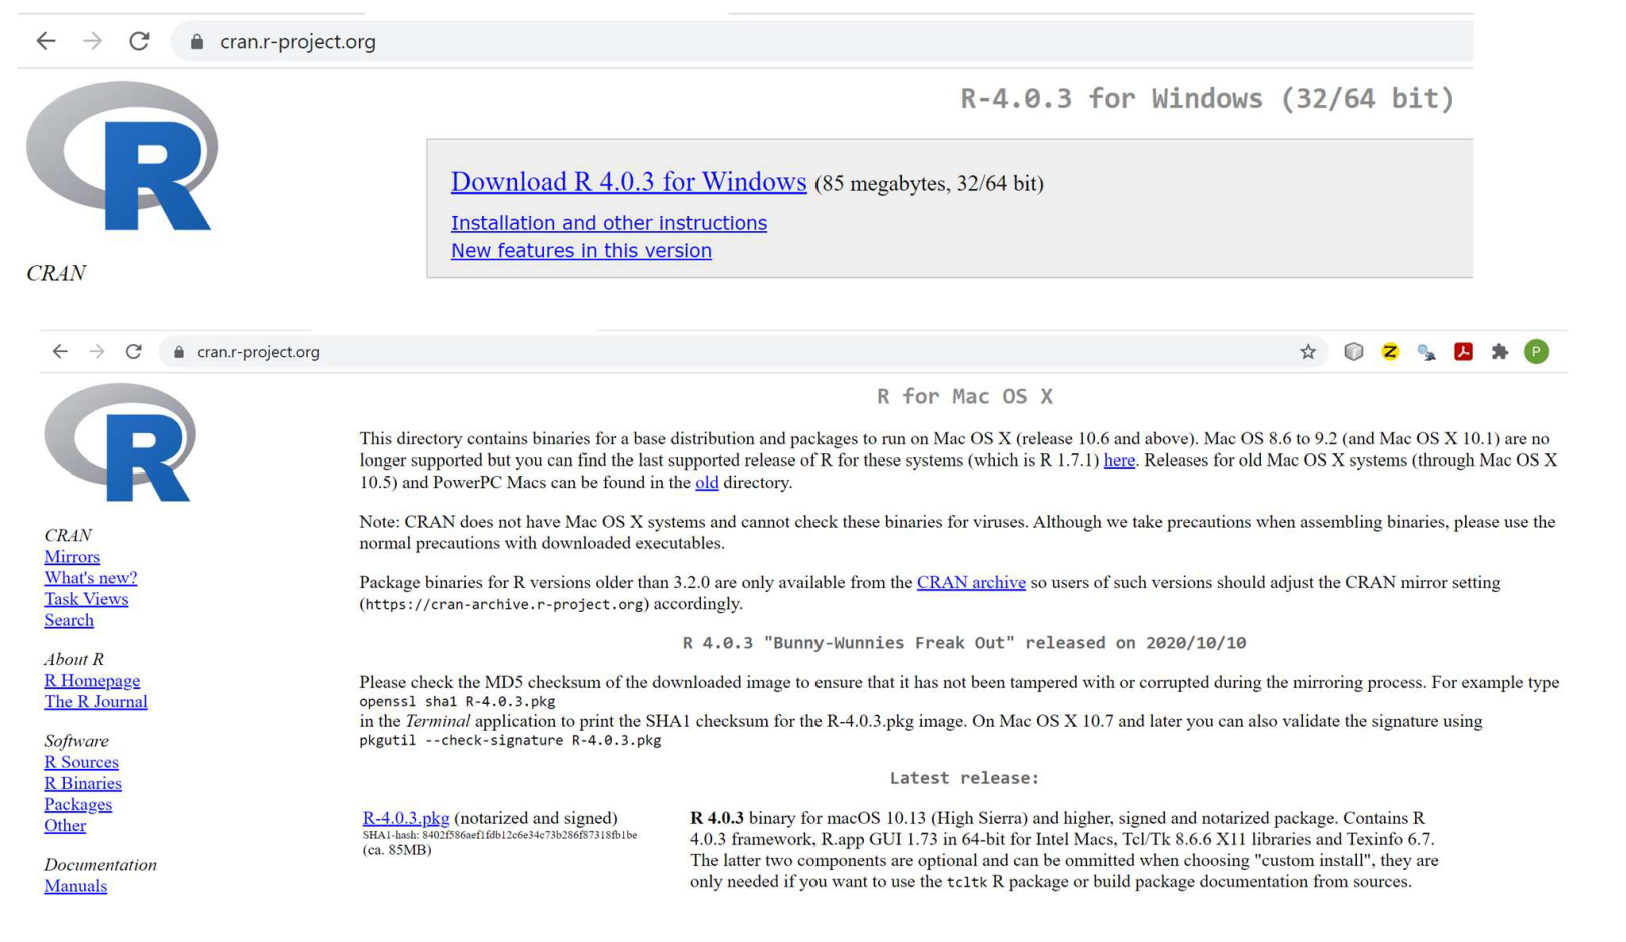
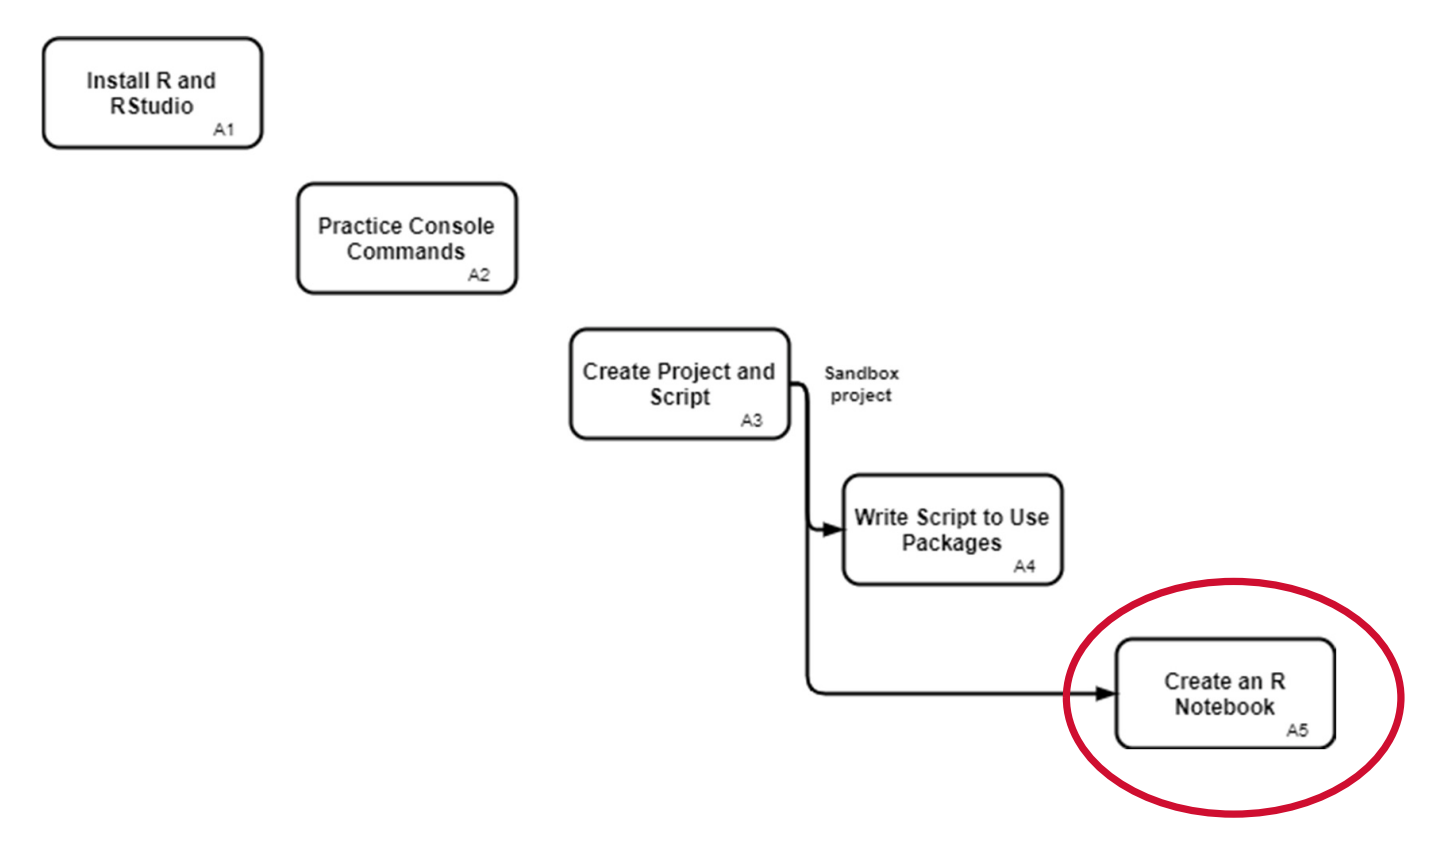
Install R and RStudio
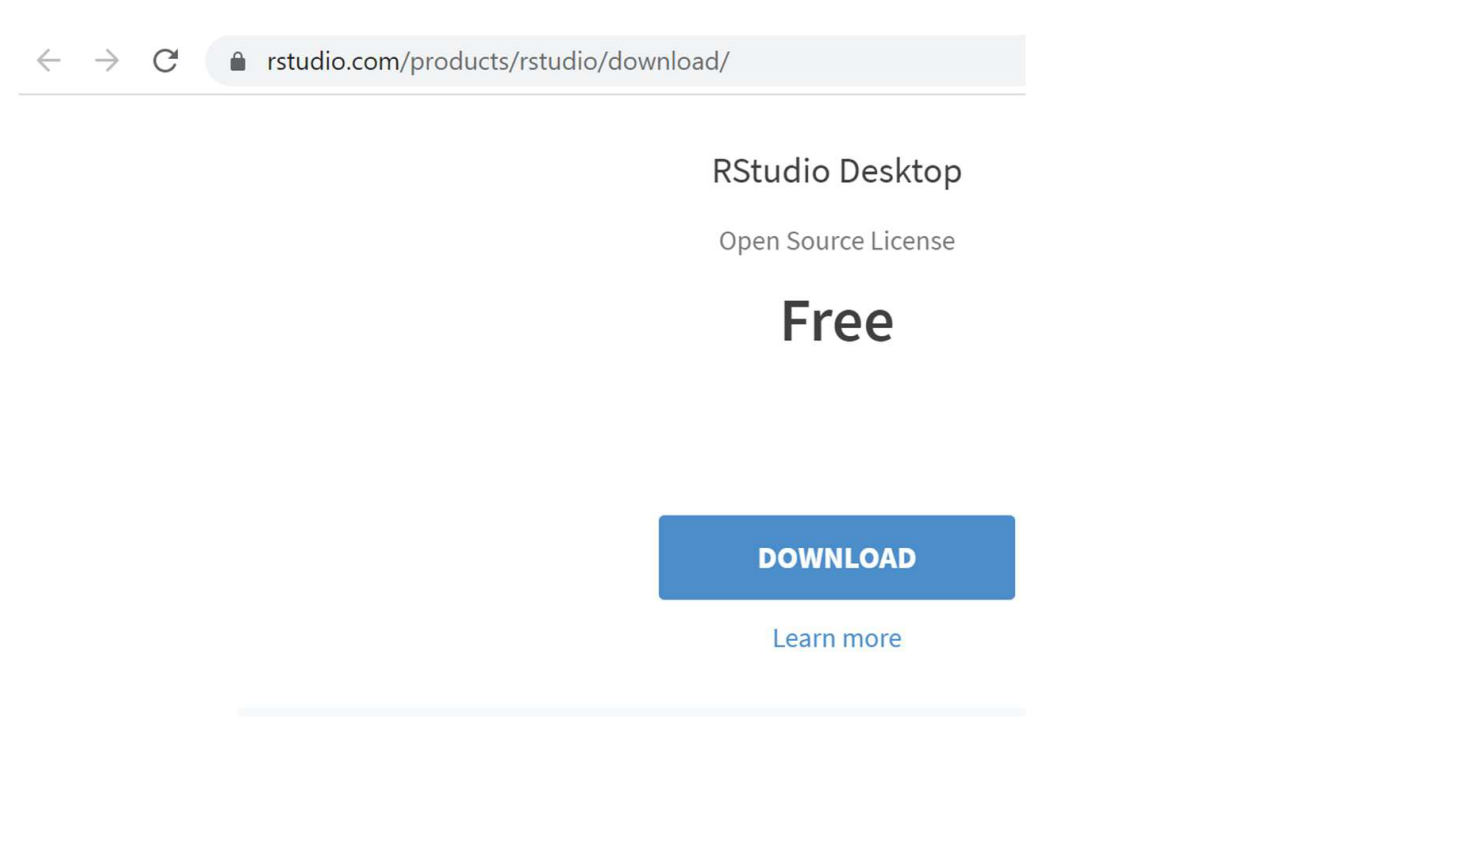
Download and install the free version of RStudio Desktop. Choose the installer (Windows 10, macOS, Ubuntu…) appropriate for your operating system.
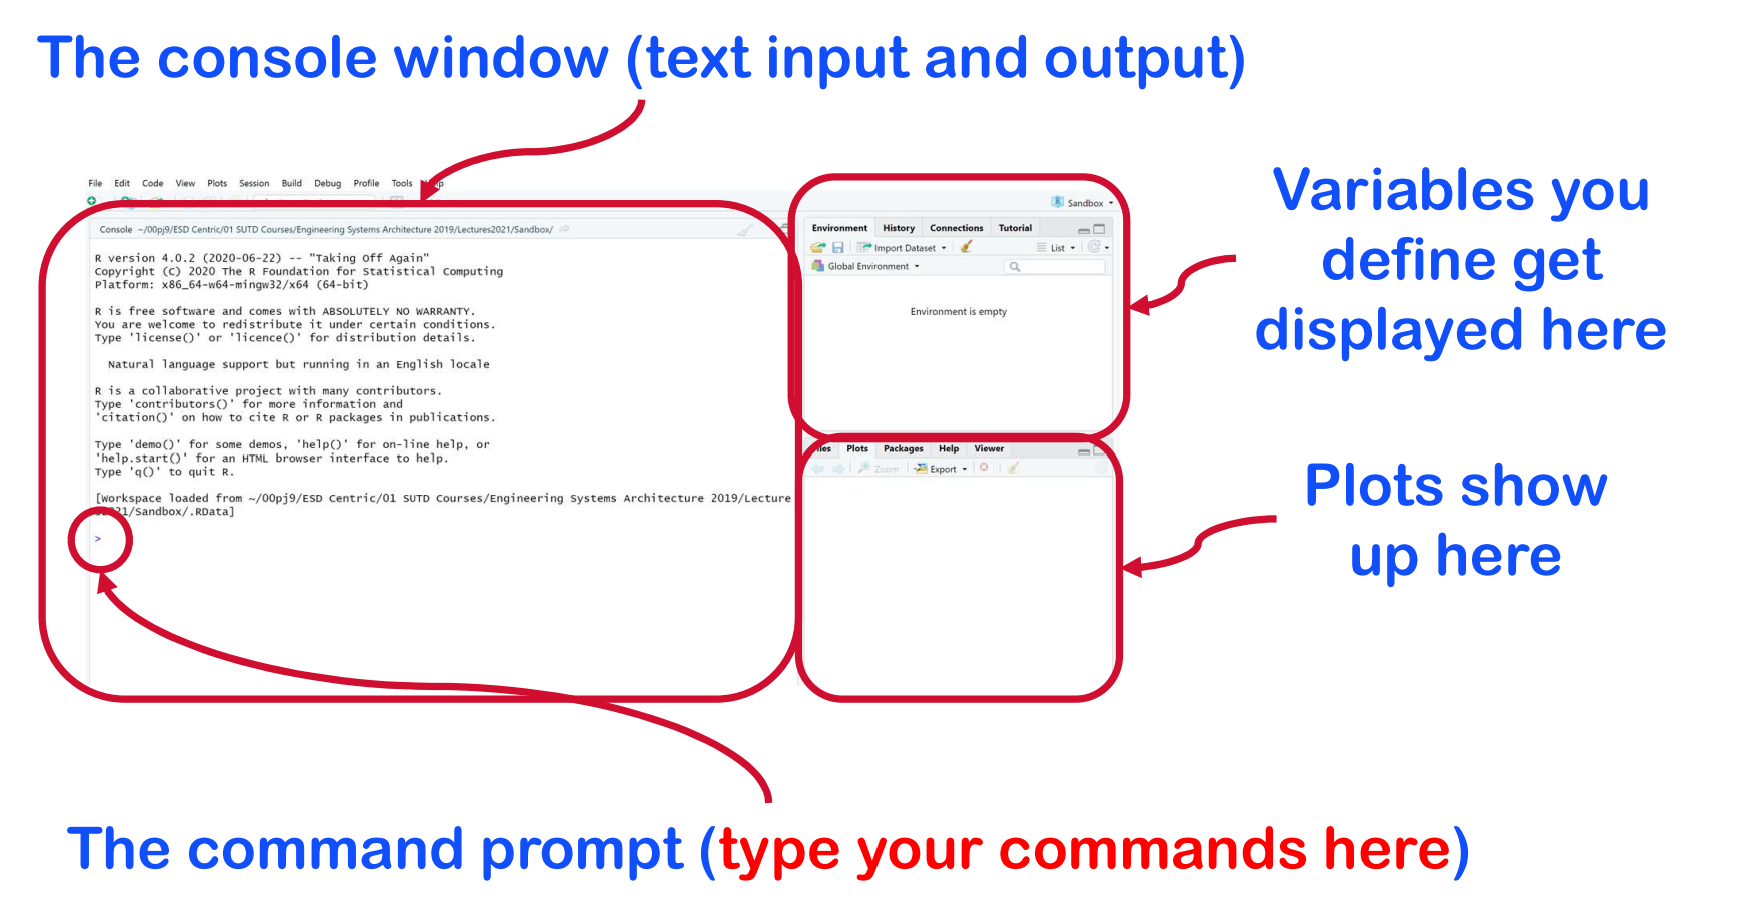
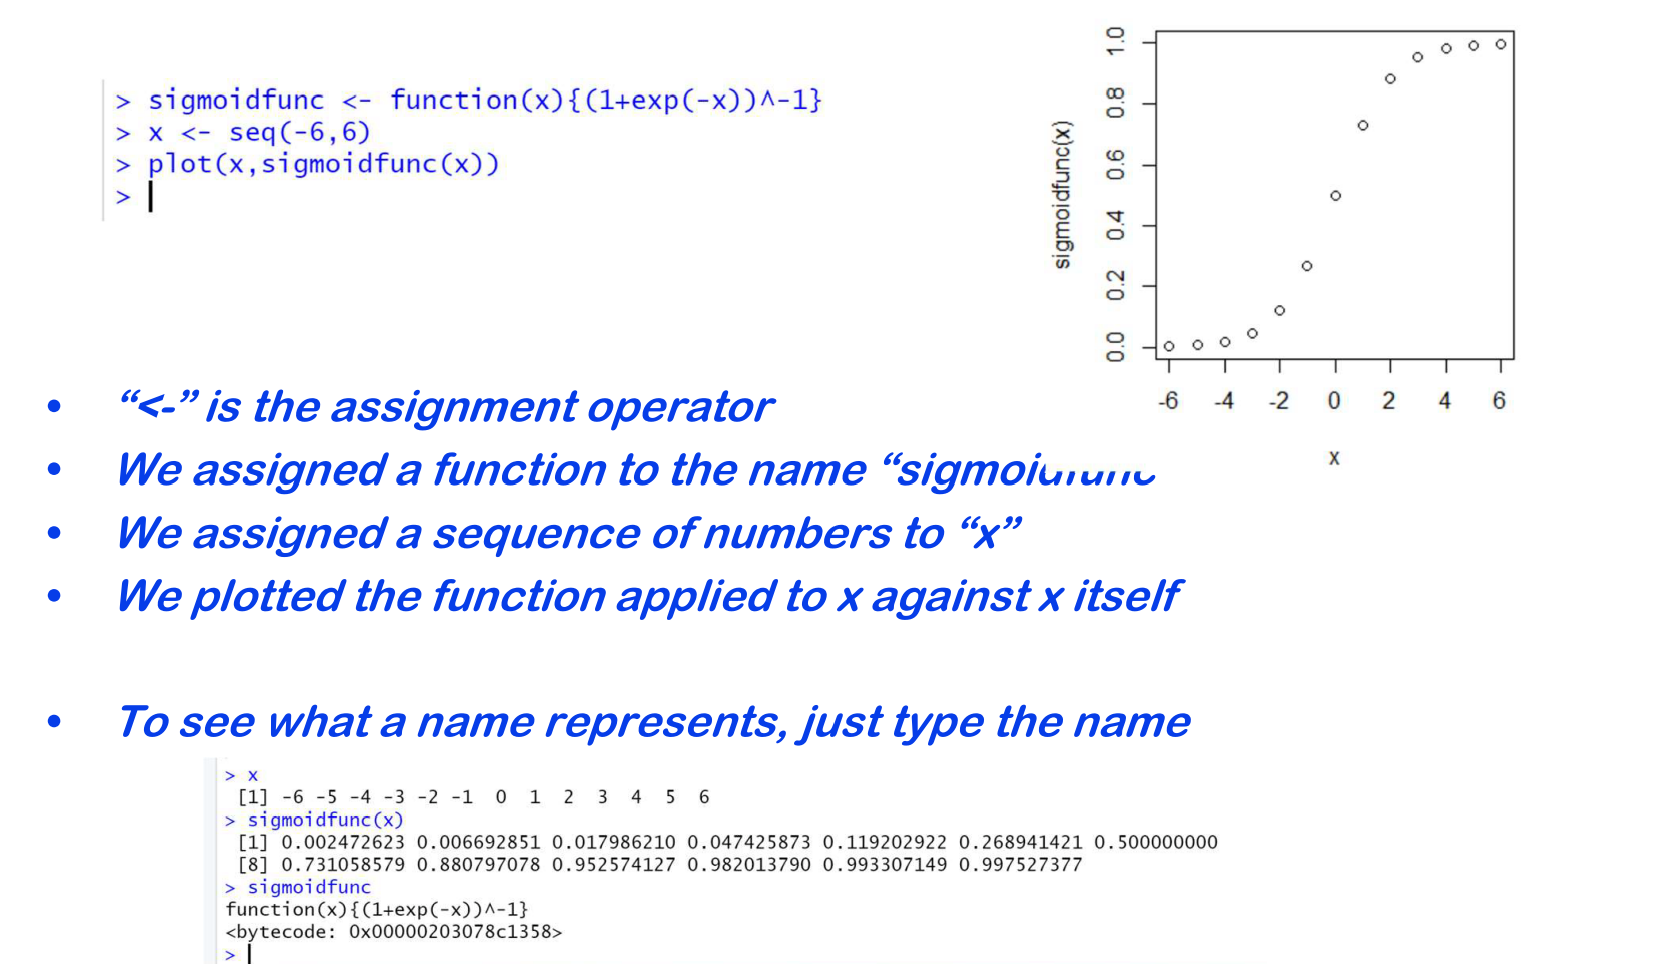
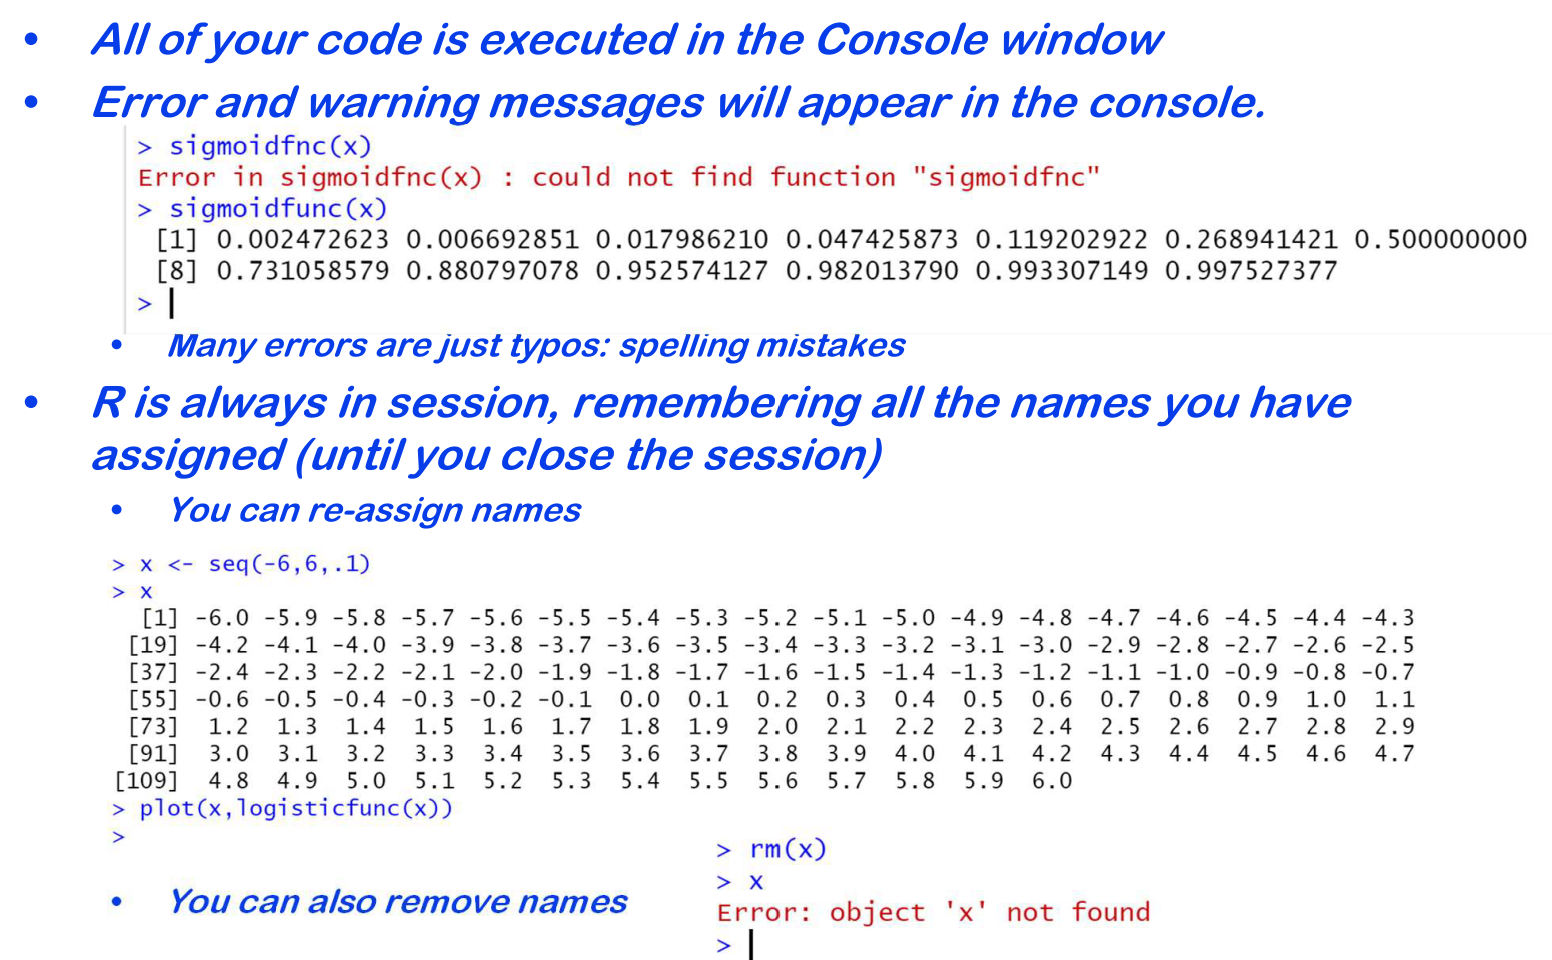
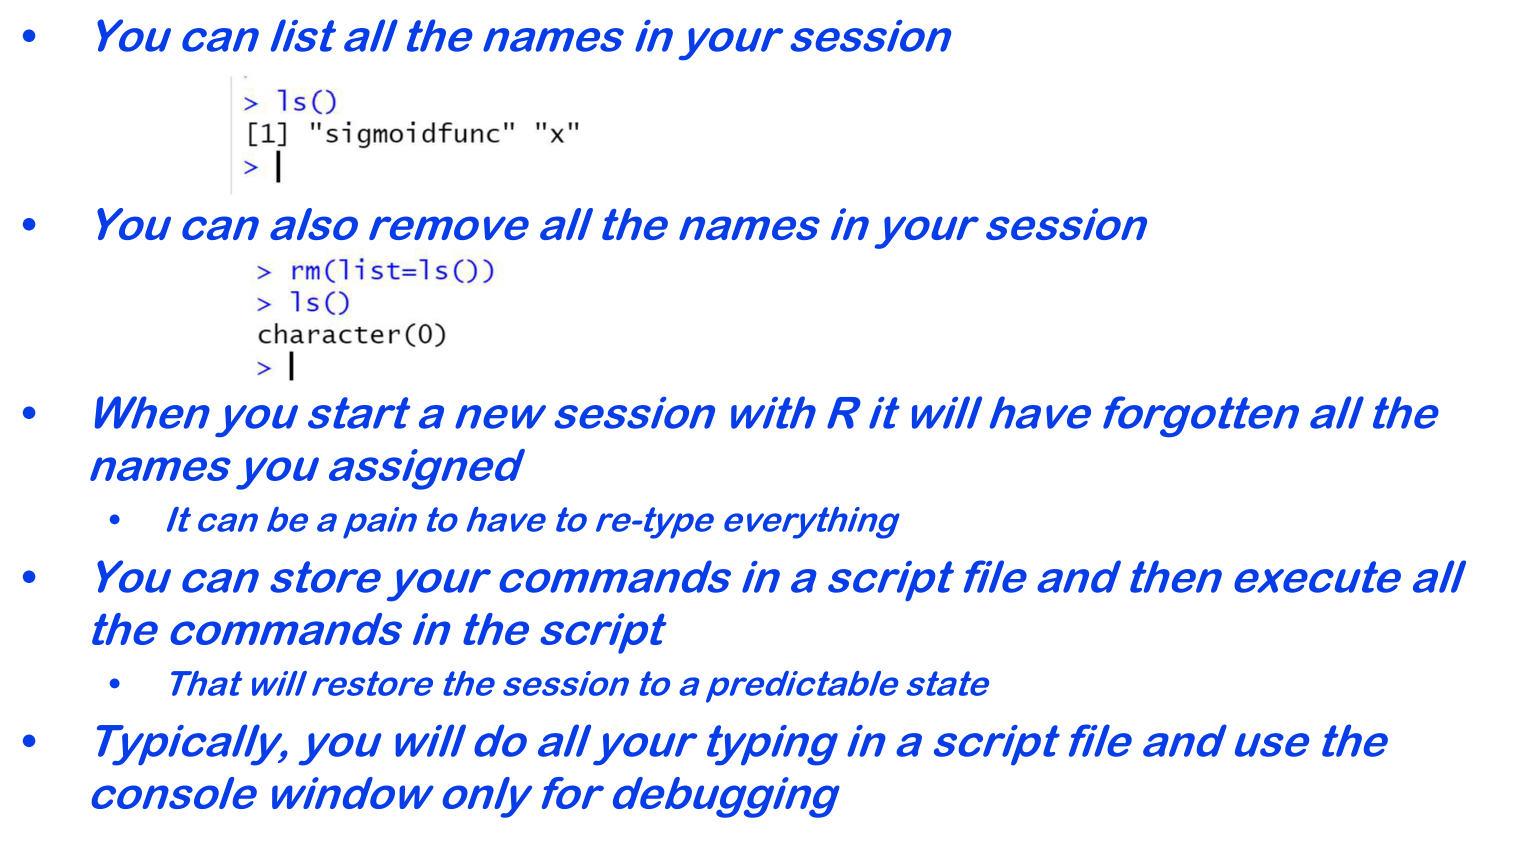
Practice Console Commands
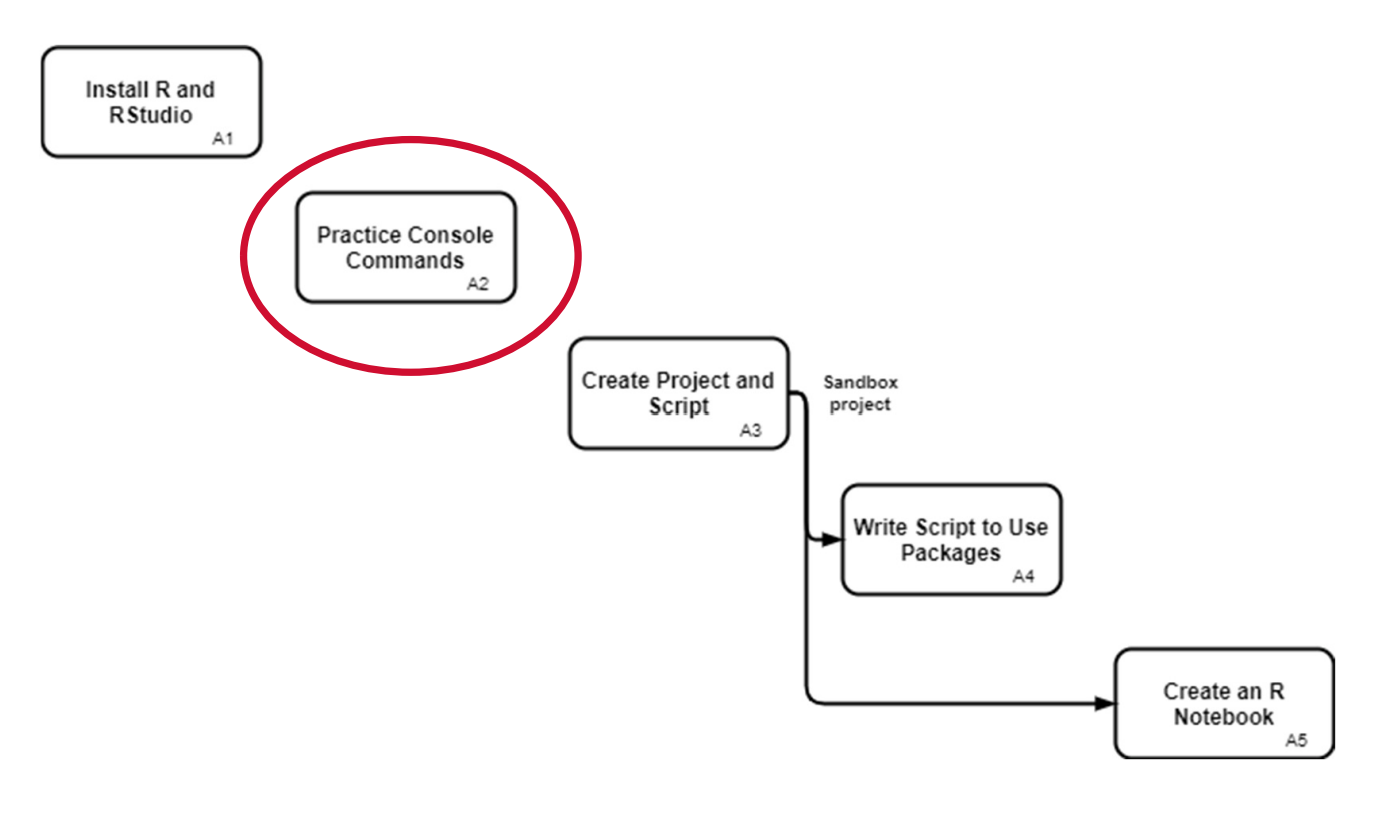
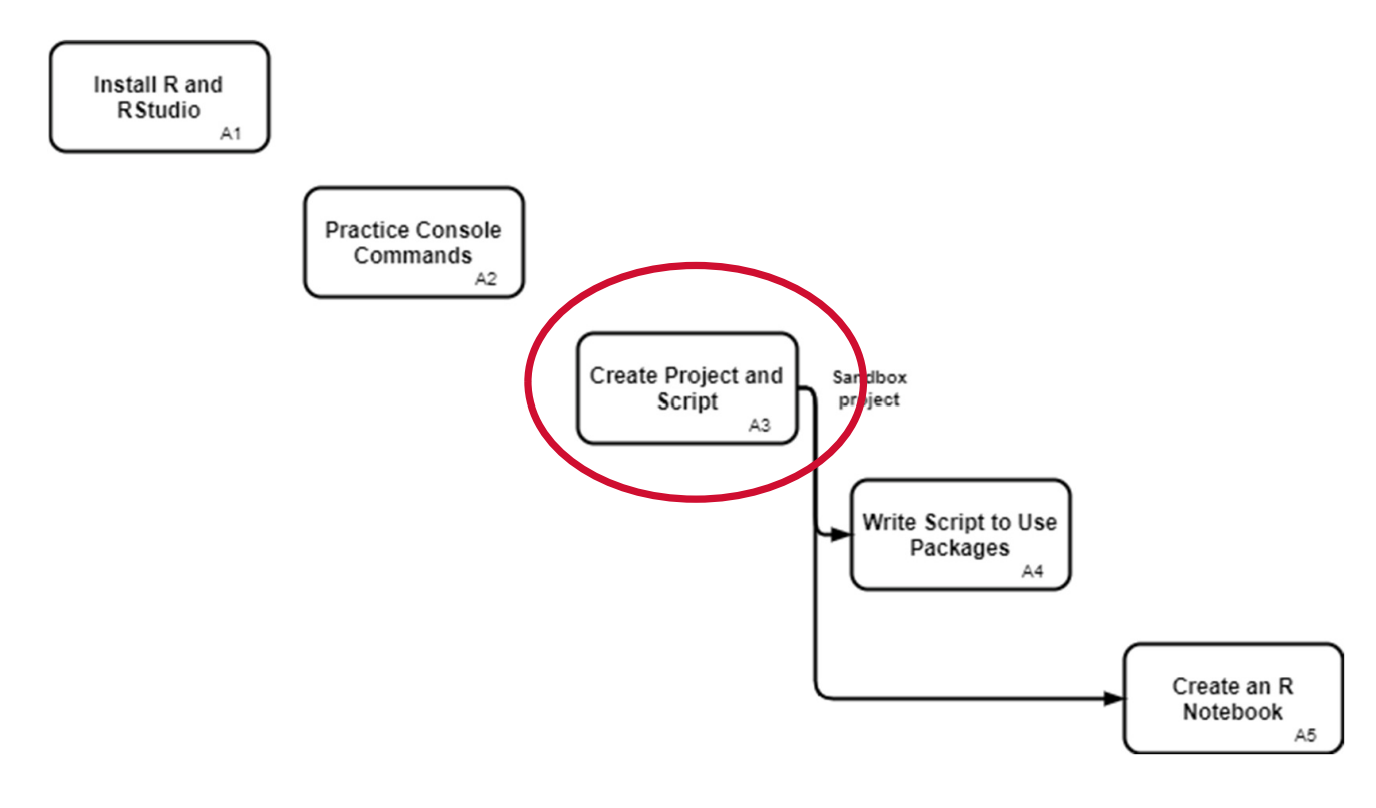
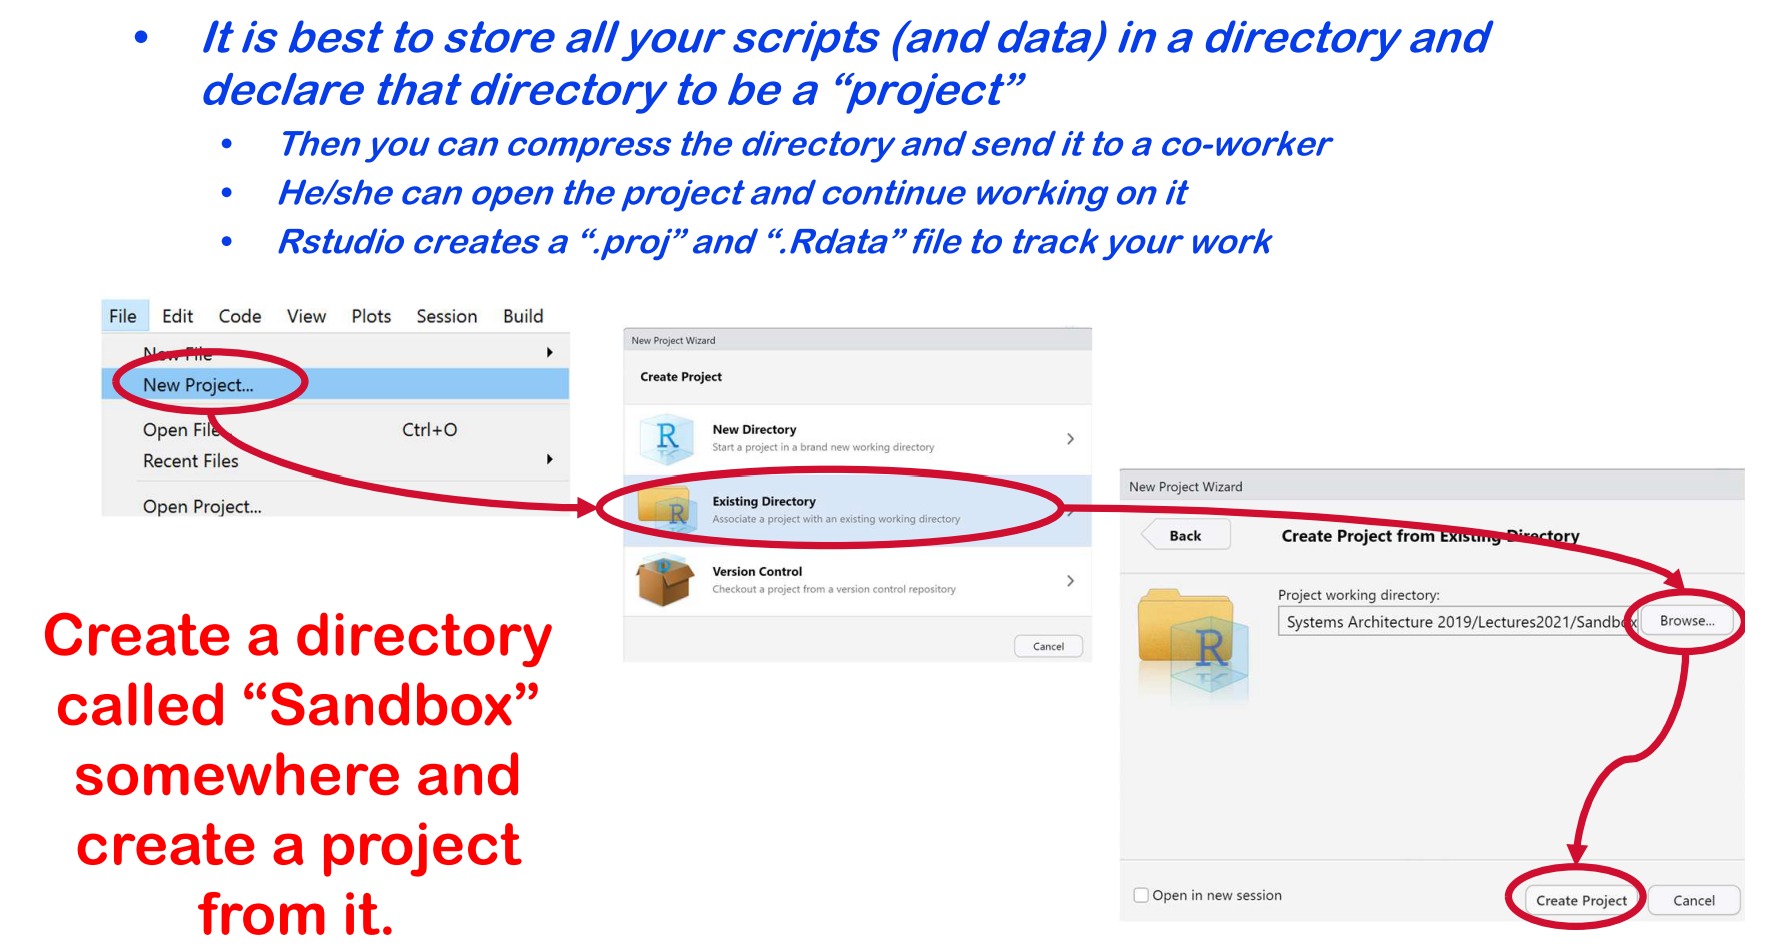
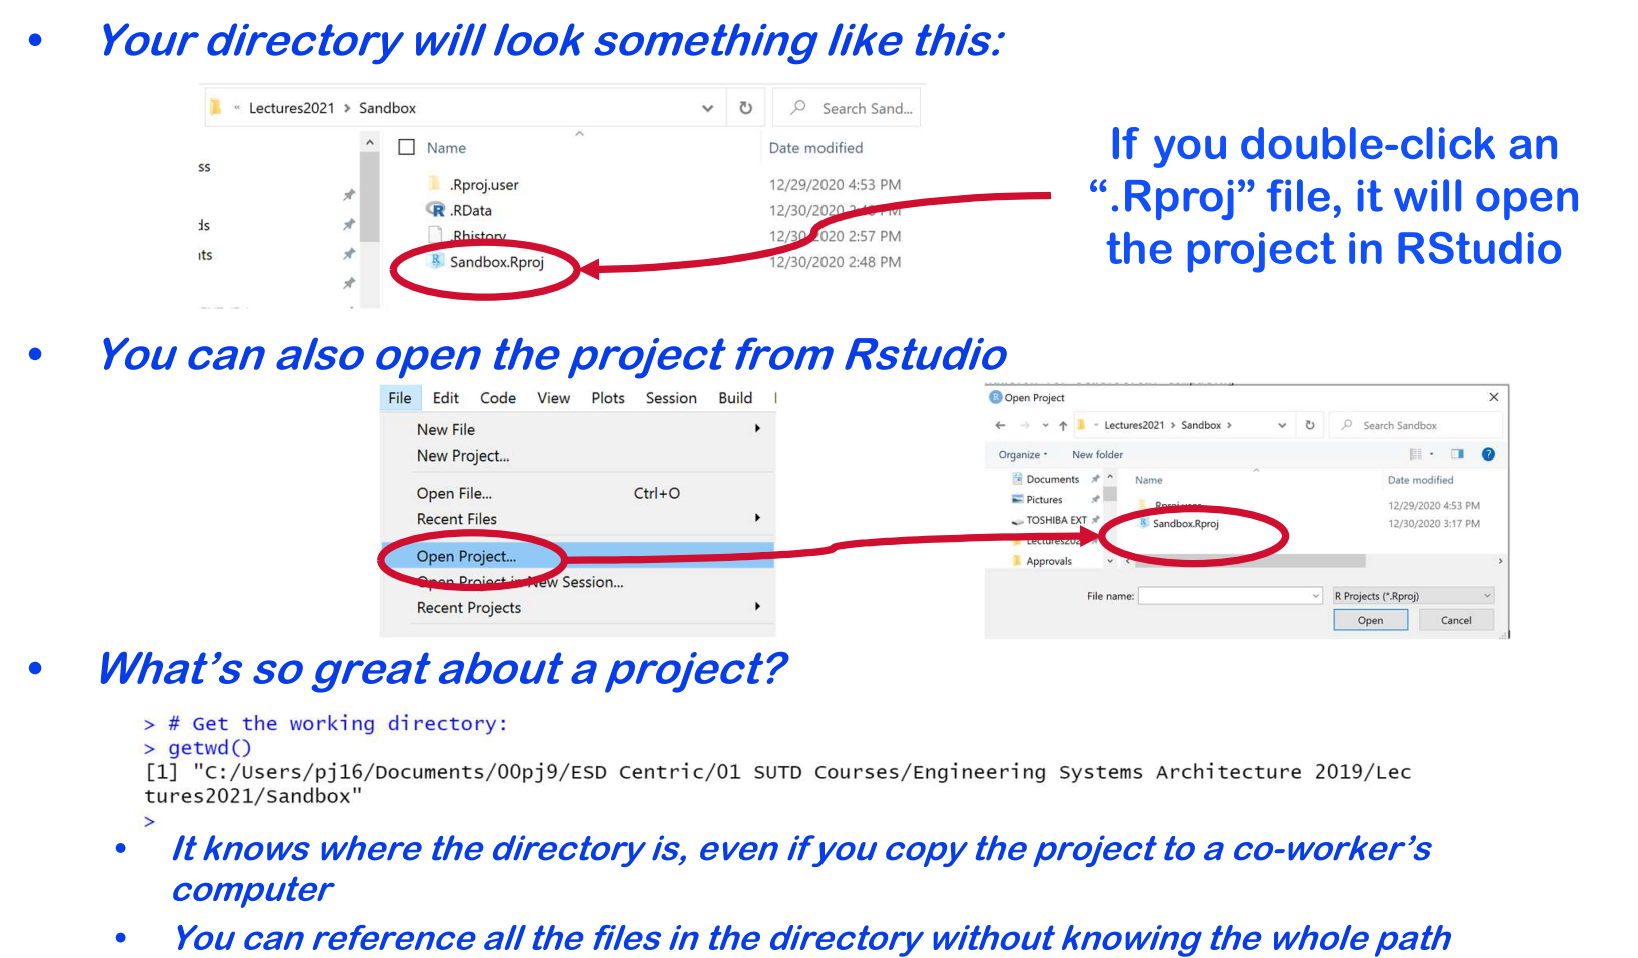
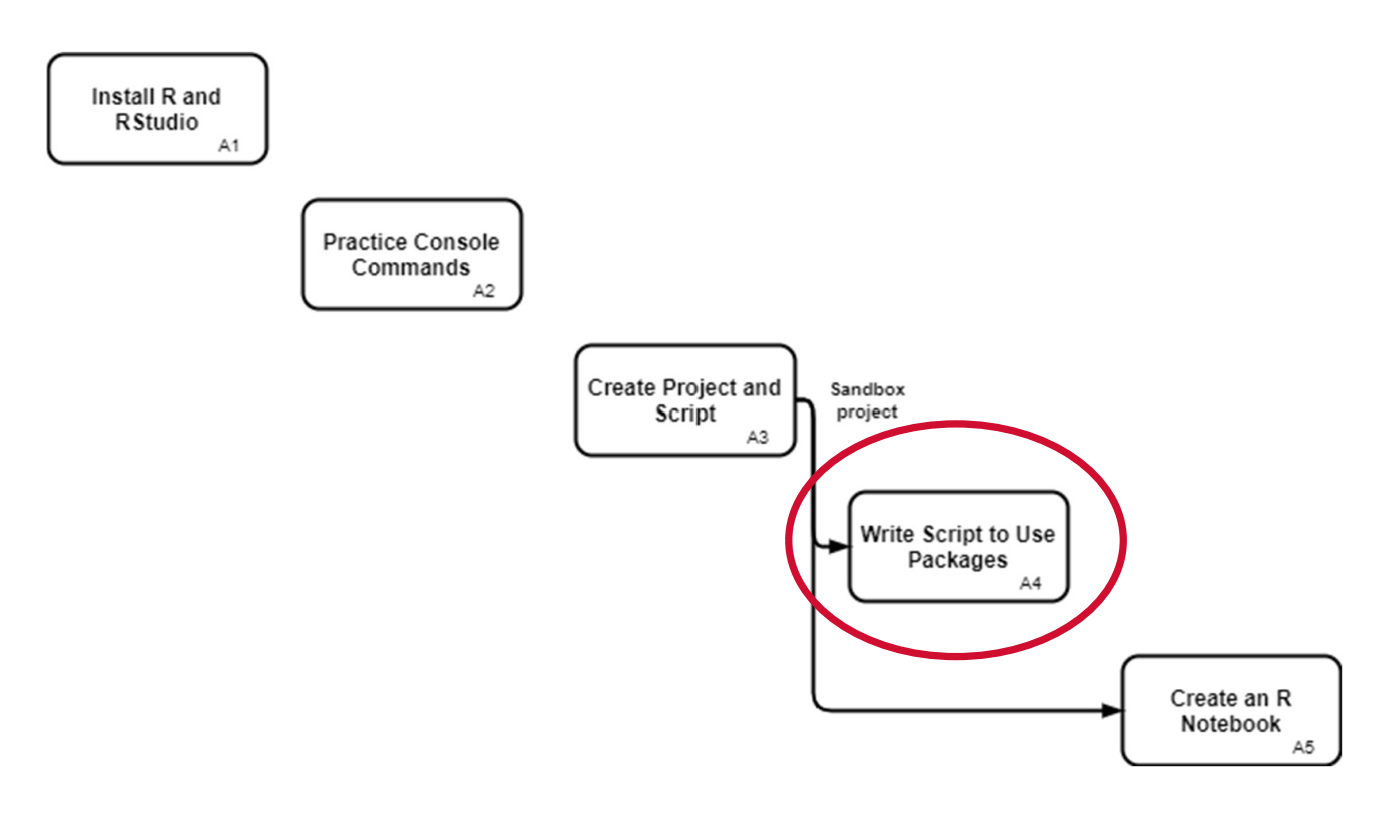
Create a Project and Script

Write Script to Install Packages
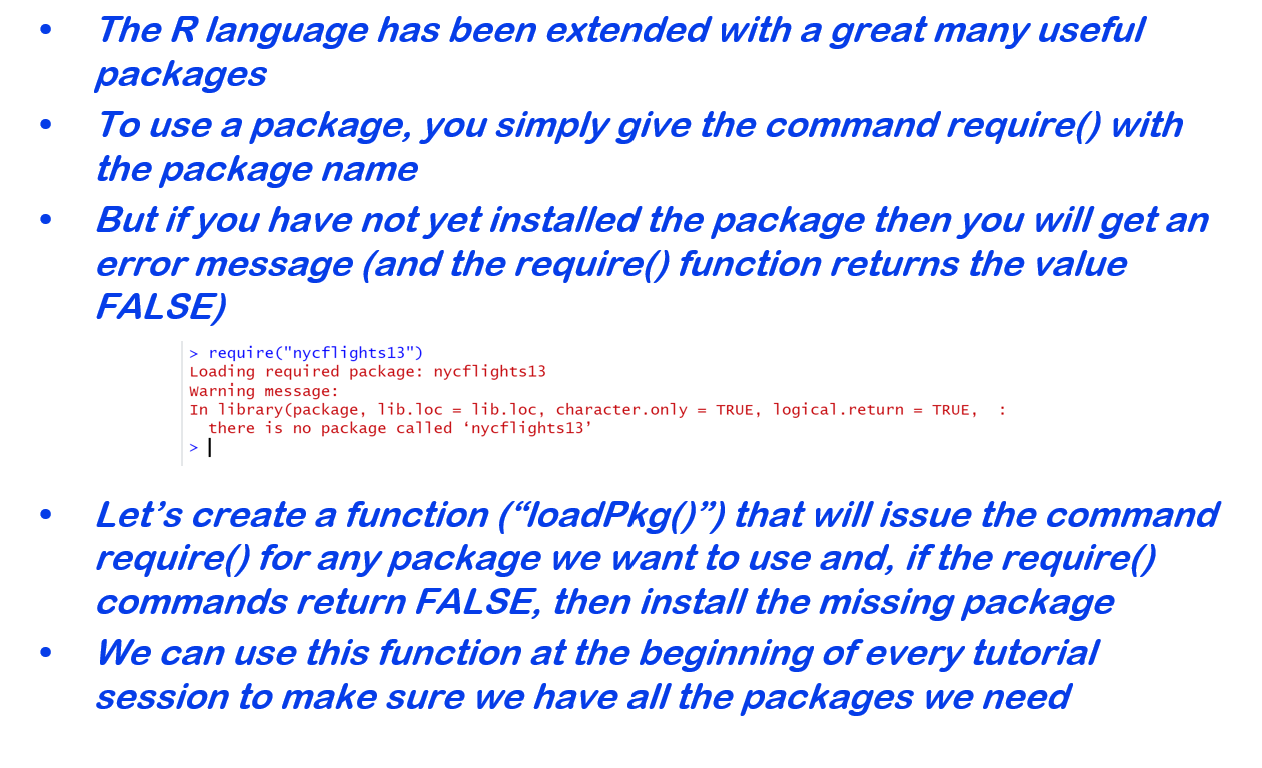
Here is a function you can use to automatically install a package if it has not been installed and then load the package.
loadPkg <- function(pkgname){
  # require() is the same as library() but returns a logical
  # character.only= TRUE means pkgname is the name of the package
  isInstalled <- require(pkgname,character.only = TRUE)
  # If the package has not been installed yet, then install and try again
  if (!isInstalled) {install.packages(pkgname); library(pkgname,character.only=TRUE)}
}
# now test this function
loadPkg("dplyr")
Create an R Notebook
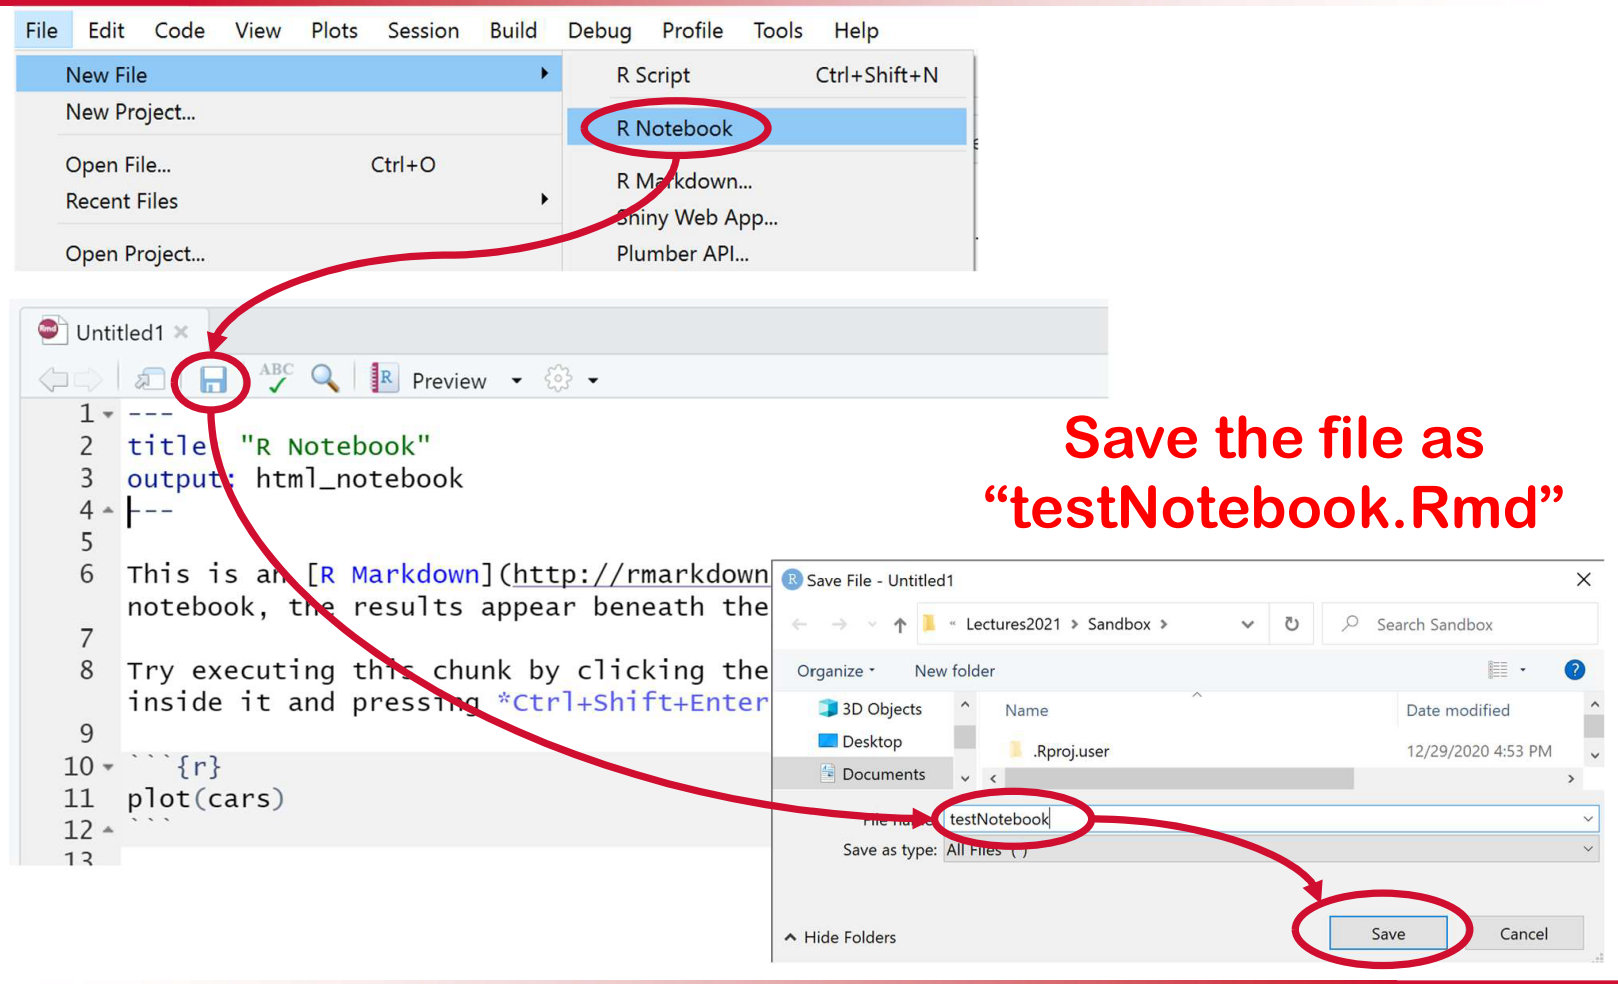
From the RStudio menu choose File -> New File… -> R Notebook, then save the resulting file:
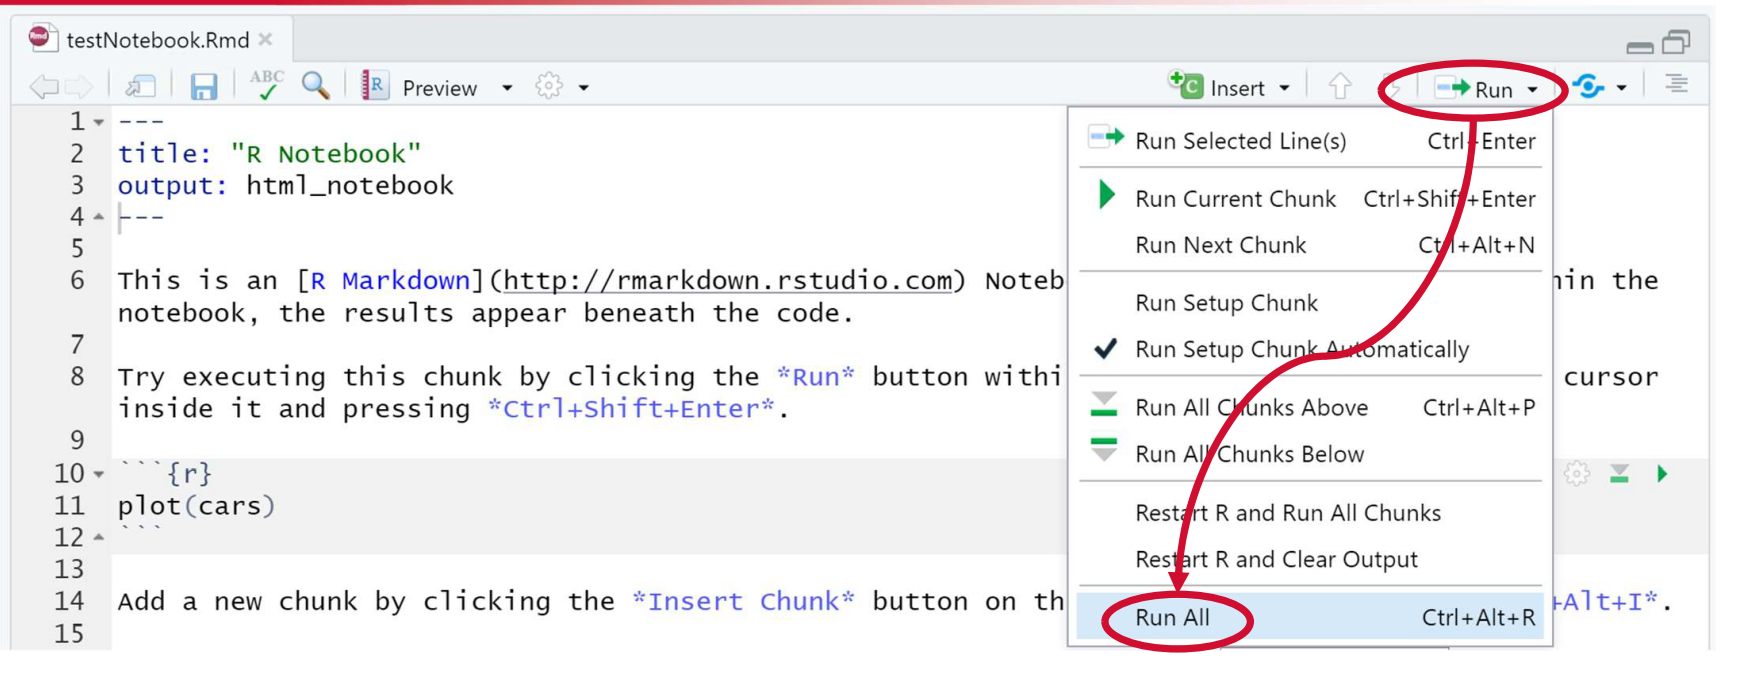
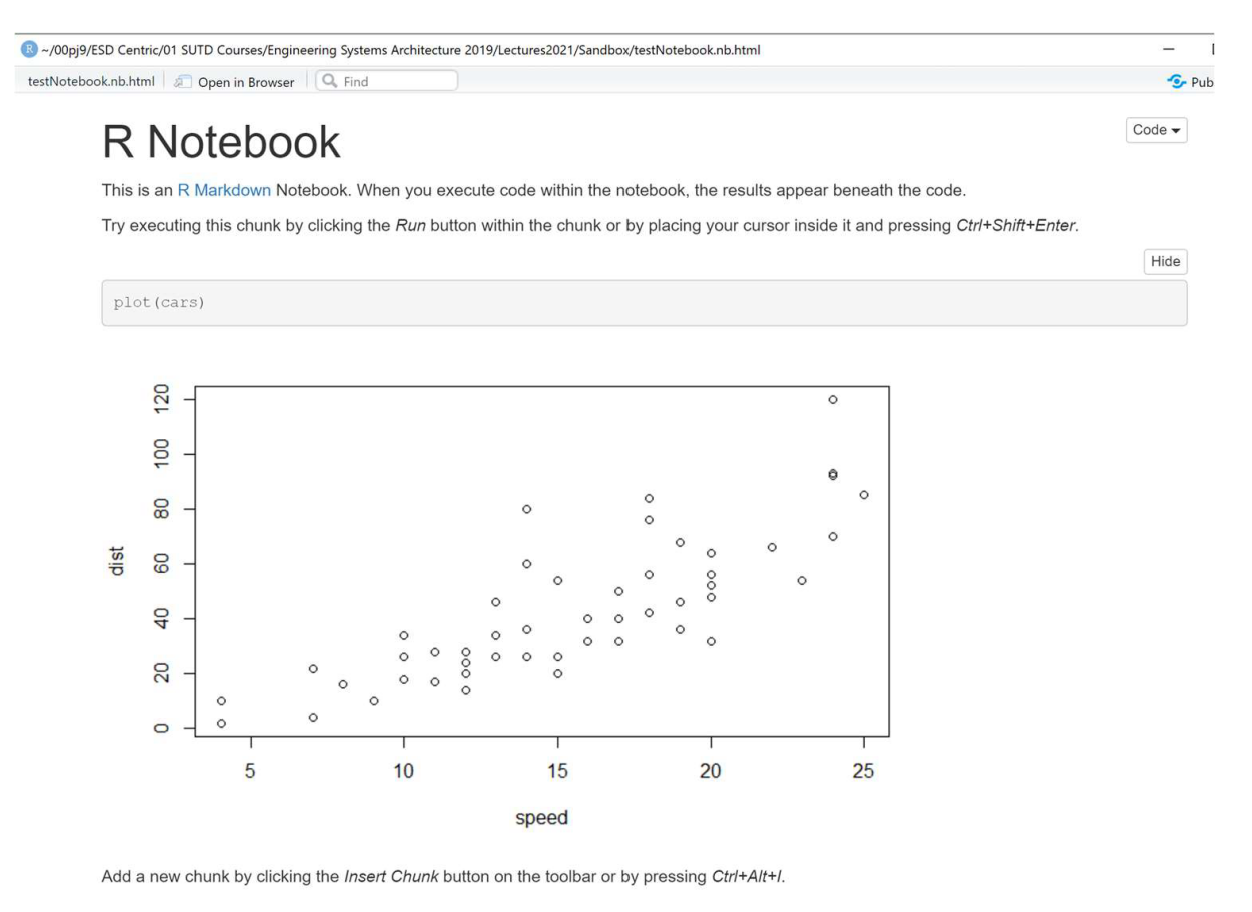
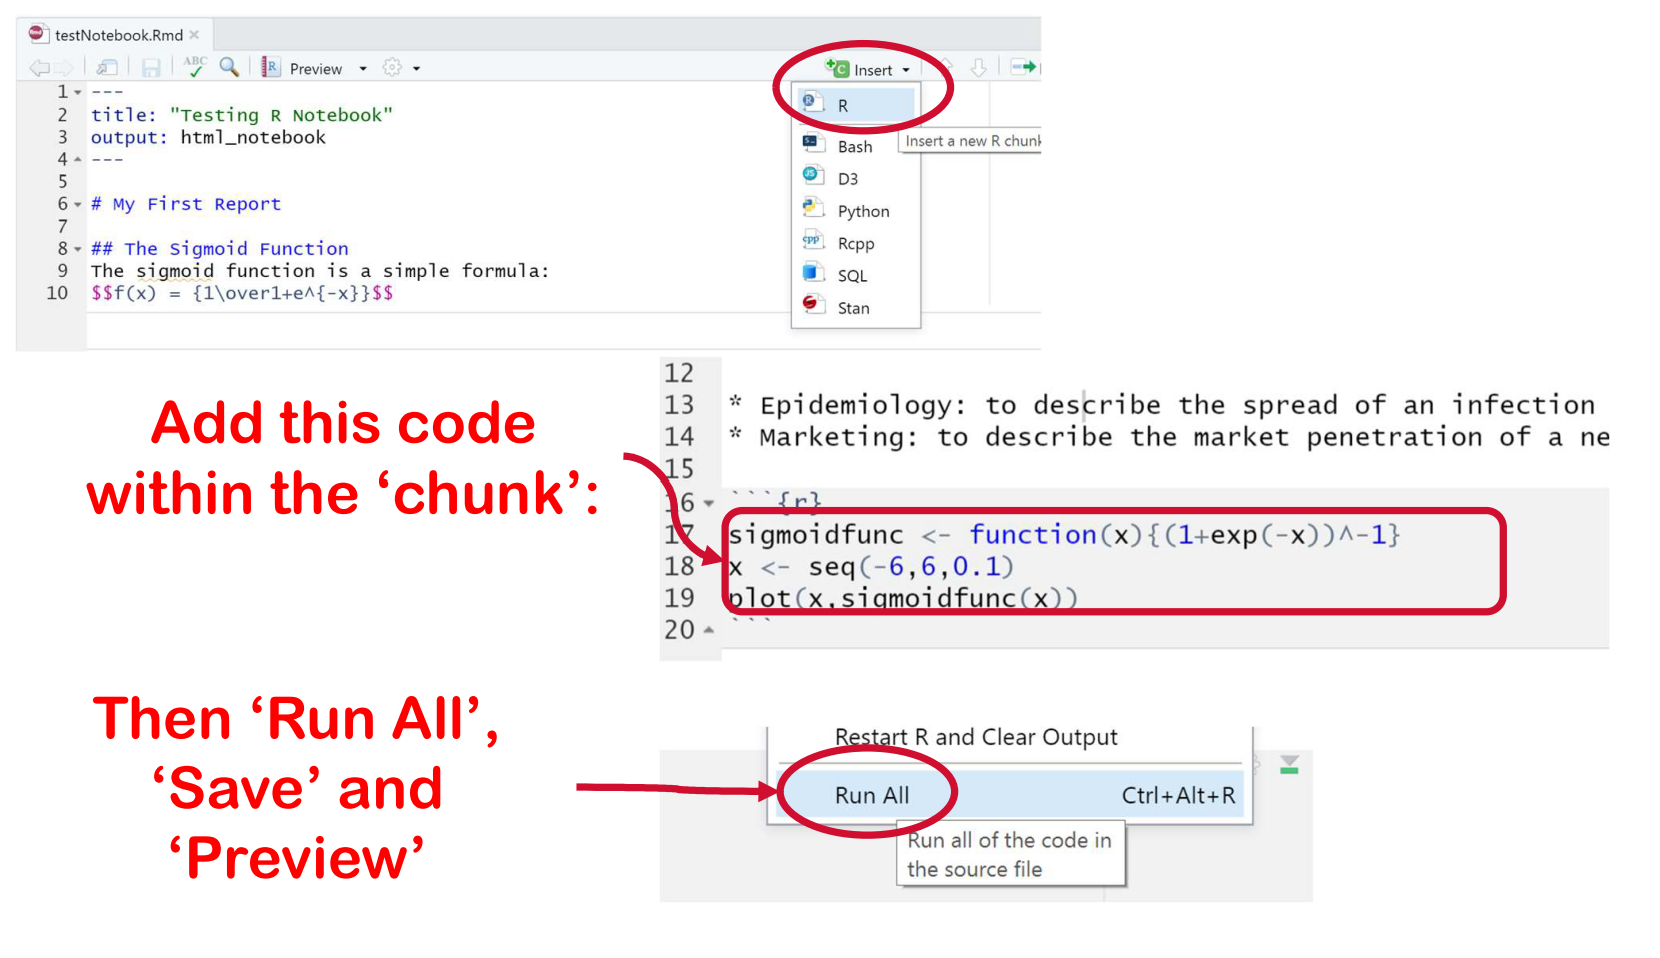
The file includes imbedded R code. Run all the code as shown here:
This should create a plot that shows up within the file. Click the menu button “Preview” to launch the document viewer.
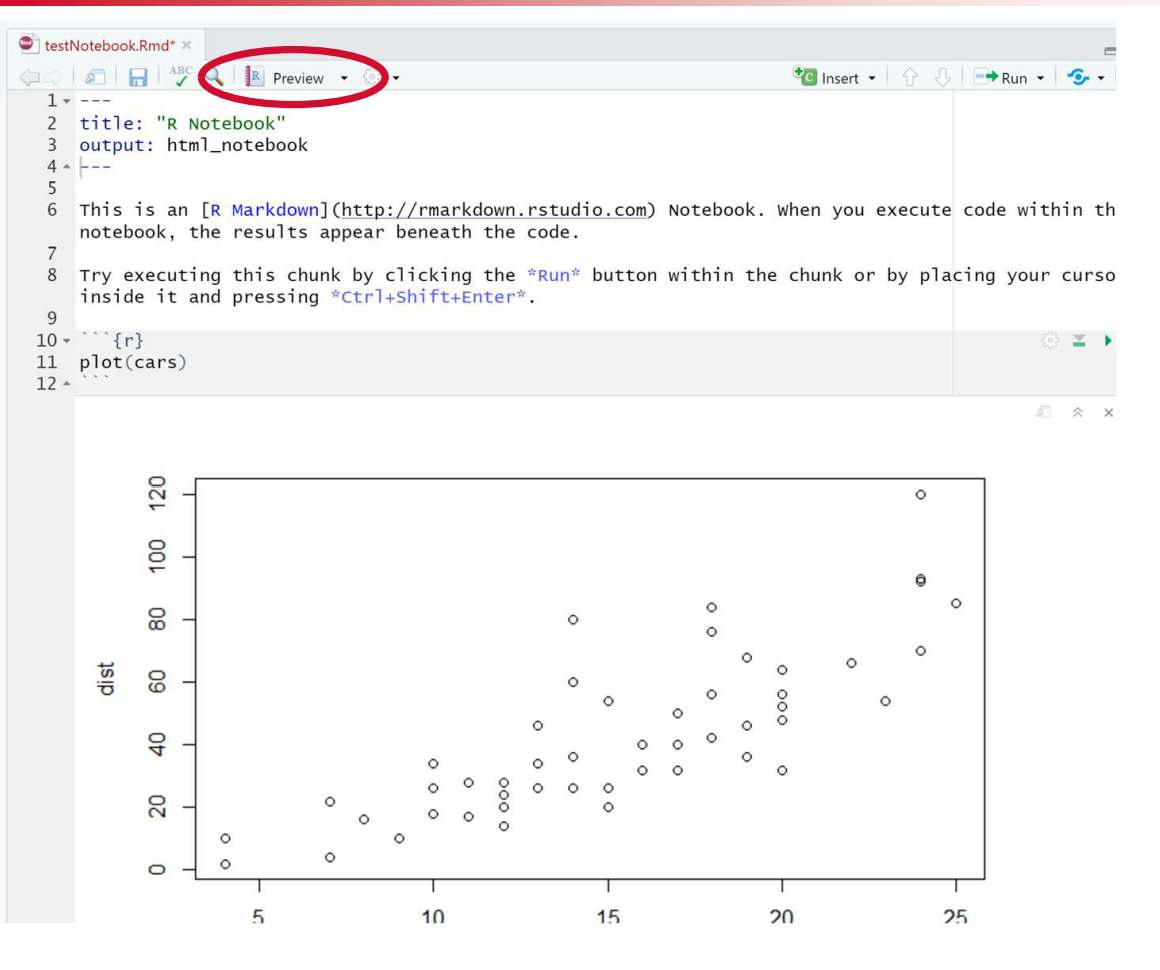
The document viewer opens in a second window. This is what your file will look like in a browser.
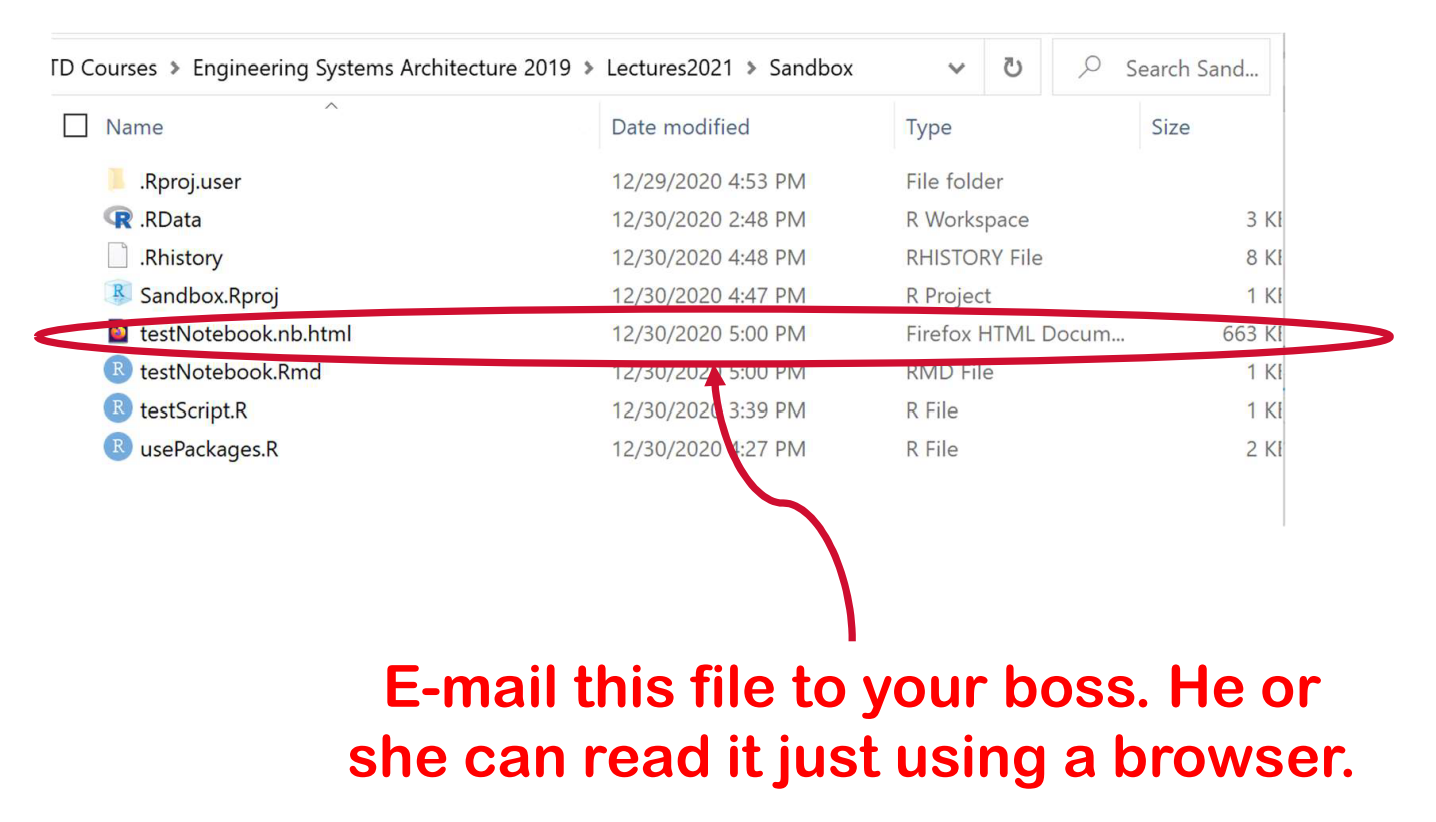
An HTML version of the file is automatically created. It contains everything needed to display your document. E-mail the file to anyone you want to share your document with.
Let’s take control of the document and create our own version.
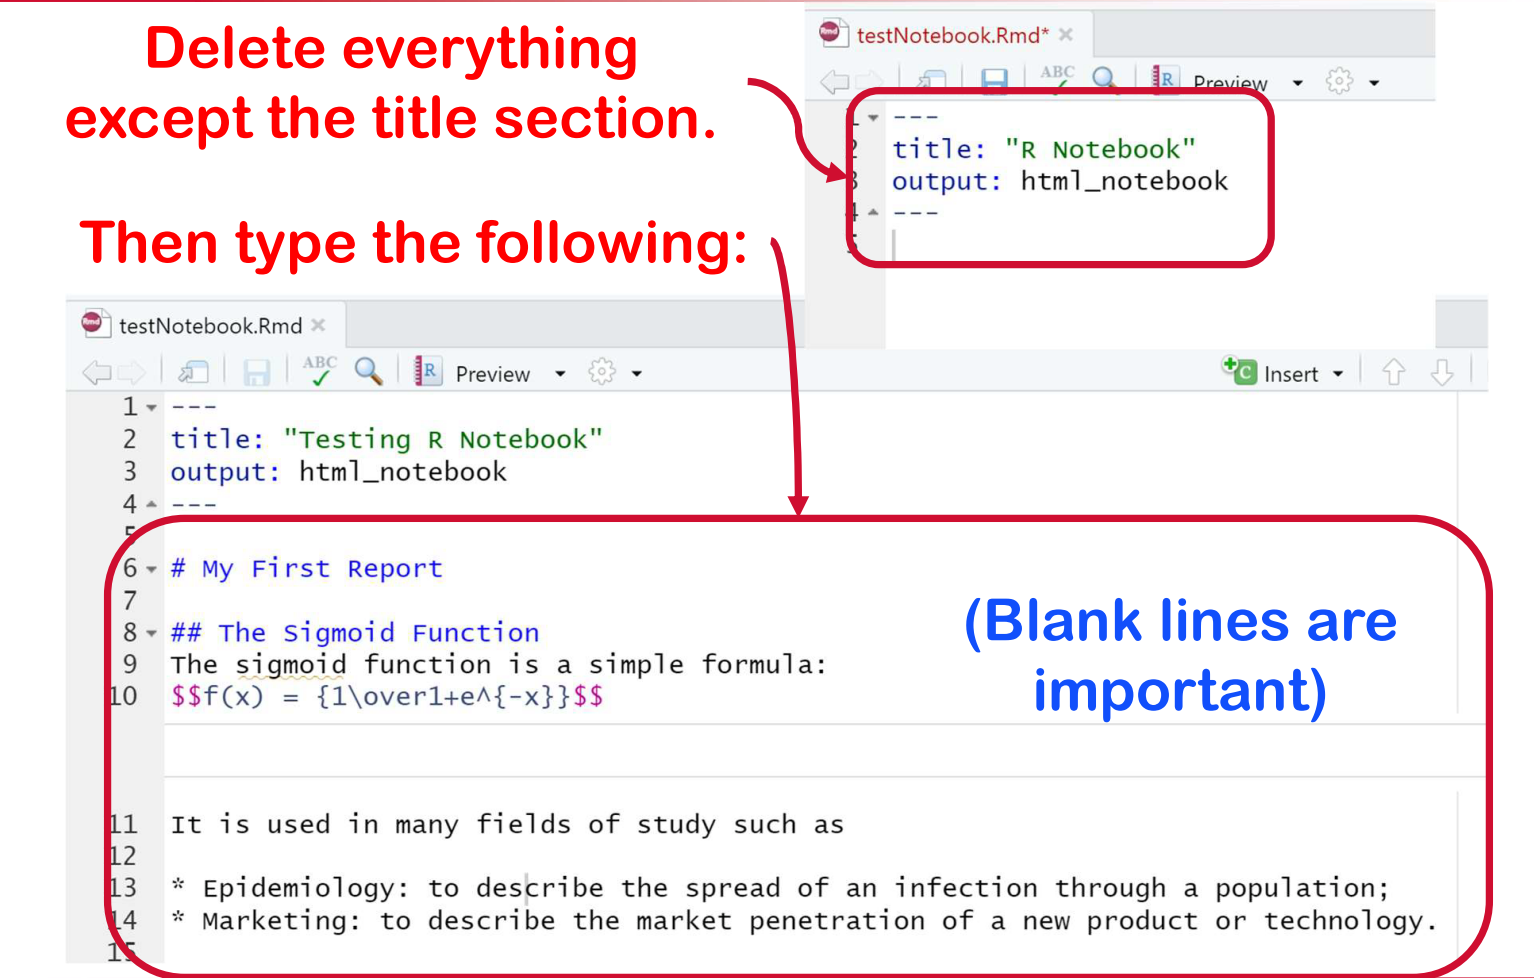
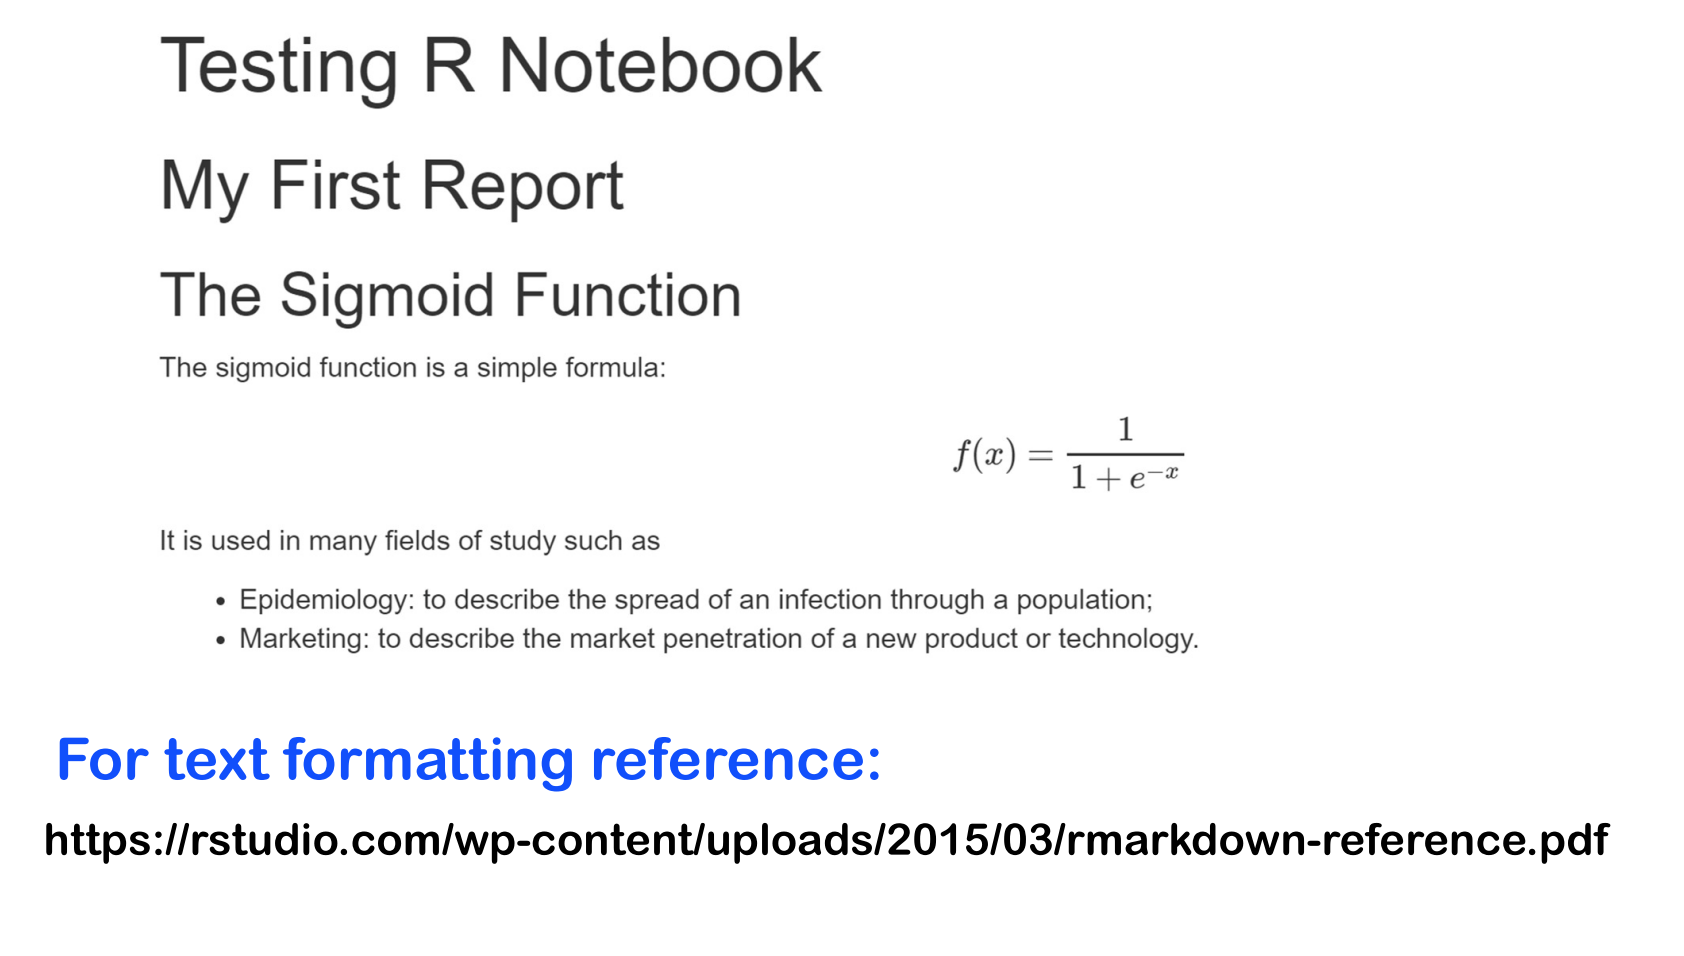
Run the code and preview the result. The R markdown language for formatting your document is not too complicated: look for reference cheatsheets as shown below.
What’s nice is that you can add your own R code and get plots and tables generated within your document.
This completes the Getting Started with RStudio tutorial.