We have successfully completed designing our system, the Toy Catapult, to a Logical Architecture level of detail.
In this tutorial, we show how to export your model in several ways to share with others.
This tutorial will demonstrate three export features of Capella.
In the first method, all diagrams are exported as images. You may then copy and paste these images into other documents.
The second method exports information and diagrams about all objects in your model as html files.
You can compress the resulting
folder and send it to your colleagues to de-compress and read. Because the files are in HTML format,
with imbedded javascript for interactivity, your colleagues can explore your model in a browser without having to install Capella.
The third method exports the entire model as a compressed file which fellow Capella users can import directly. Using an exported version of the completed Toy Catapult model, we will also show you how to import it into a new workspace.
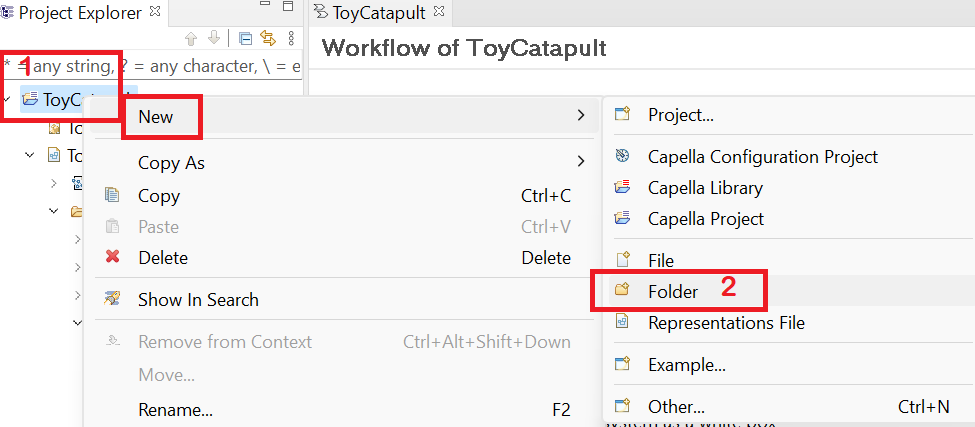
(1) Right-click on ToyCatapult in the Capella Project Explorer, and
(2) click New → Folder.
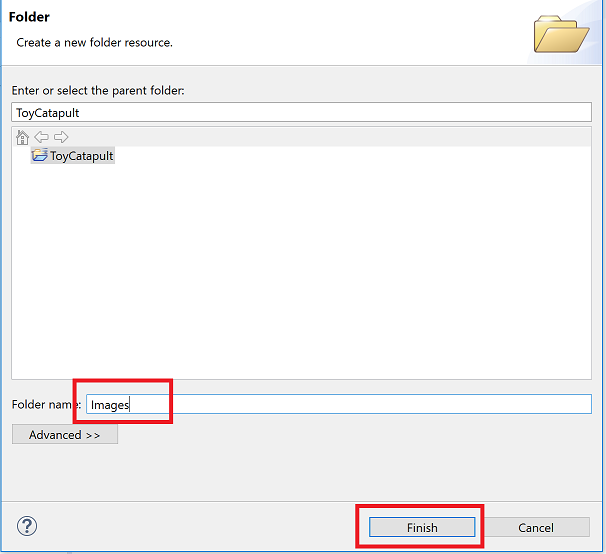
Name the folder as Images.
We will use the Images folder to locate our diagrams as images.
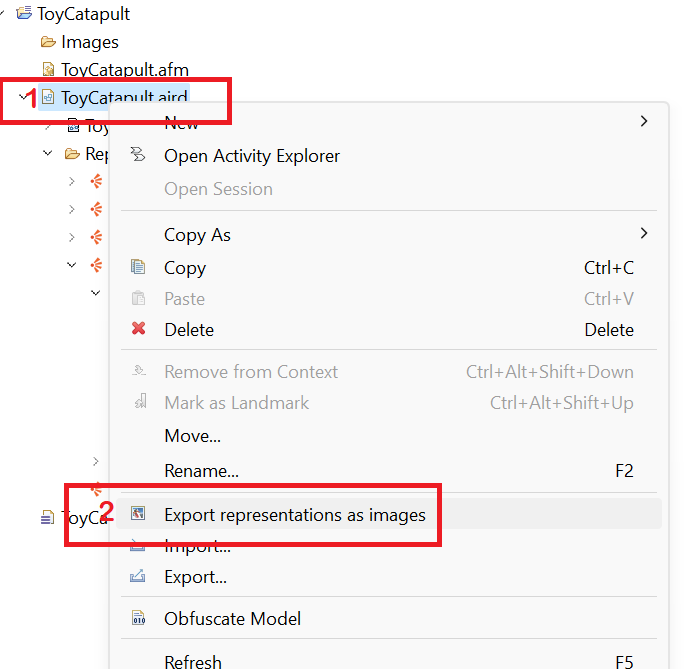
(1) Right-click on ToyCatapult.aird in the Capella Project Explorer, and
(2) click Export representations as images.
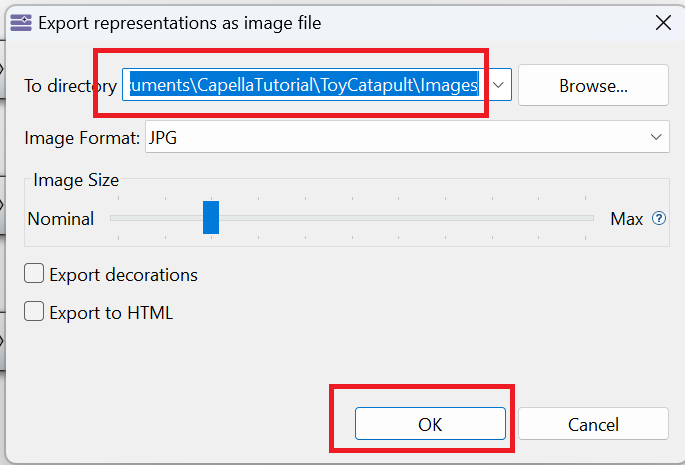
In the dialog window, browse the Images folder we have just created, and click OK.
The images will be exported.
Open the /ToyCatapult/Images folder to check and view the diagrams.
Double-click on any entry in the folder to view the image.
You can import any of these images into your MS Word or MS Powerpoint presentations. But that is a manual operation and if you change the model,
you may have to update your documents with the revised diagrams. It would be nice to have
more automatic document generation. That is what the next feature provides.
2. Export Representations as HTML Files
Note that this method provides a more convenient product that contains all diagrams and all objects in the model database.
It also allows for easy navigation among these objects.
In order to generate the html files, we need to use a Capella dropin. If you are using a lab computer at SUTD, it is likely
that this dropin has already been installed.
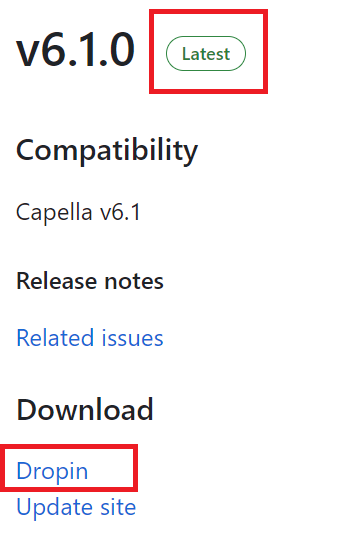
Download the XHTML Documentation Generation dropin by checking
for XHTML Documentation Generation Dropin file in the Add-ons
section of the following PolarSys website: Capella Extensions - Add-ons
Look for and click on Download. Choose Dropin of the latest version.
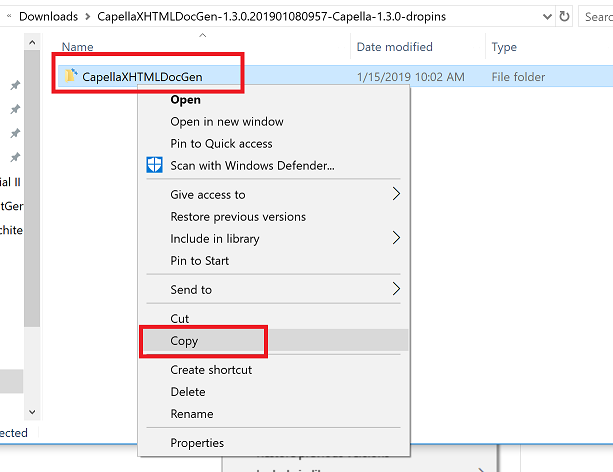
Unzip the downloaded file:
Right-click on the extracted folder and copy the folder.
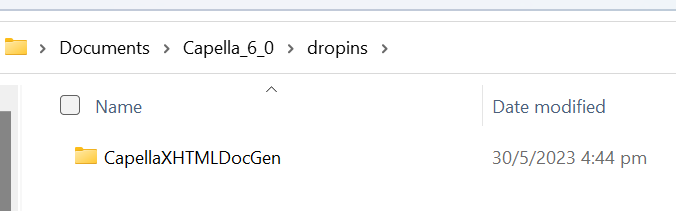
Open Capella_6_0 → dropins folder (or your current Capella installation folder and dropins sub-folder) and paste the CapellaXHTMLDocGen folder.
Restart the Capella project: (1) close Capella, and (2) open Capella in the same workspace.
This add-on will enable HTML Documentation Generation feature.
You may use the feature directly to create the default documentation.
On the other hand, the following steps will illustrate how to add more details using the Documentation page.
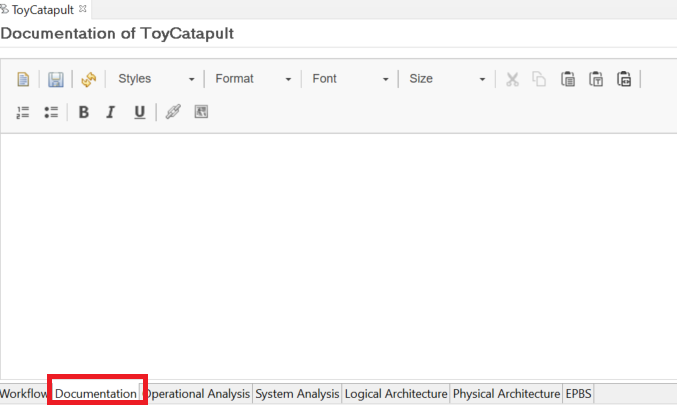
Open the Documentation tab of the ToyCatapult Activity Explorer.
Add whatever formatted text you would like for an introduction to the model.
Right-click on ToyCatapult in the Capella Project Explorer, and
click New → Folder.
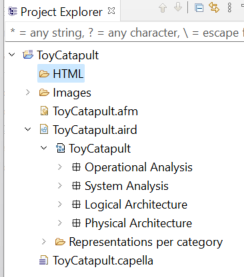
Name the folder as HTML.
We will use the HTML folder to locate our HTML files.
Right-click on ToyCatapult.aird in the Capella Project Explorer, and
click HTML Documentation Generation.
In the pop-up window, browse to the HTML folder; and click Finish.
This process may take some time.
Double-click ToyCatapult → HTML → output → index.html.
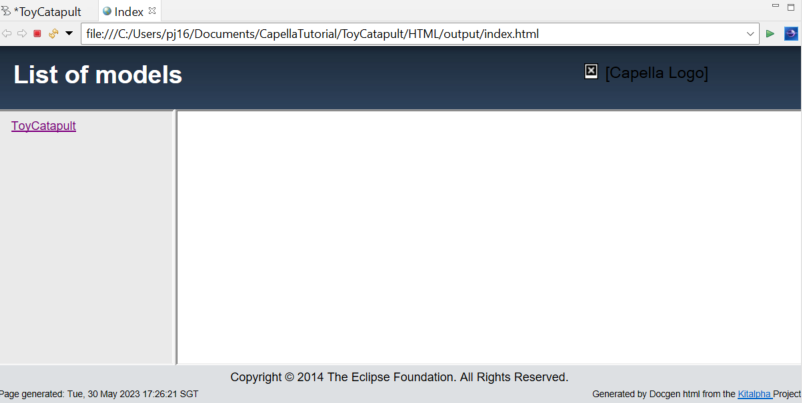
The index page will open.
Double-click the window header to maximize its size.
The index page will list the models.
Click on the only model in the list, ToyCatapult.
Notice that the HTML file has a navigation menu on the left, which matches the Project Explorer index in Capella.
Furthermore, notice the Documentation page of the project is used for the top level introduction.
You can add further documentation to model elements by filling the Summary and Description fields in the Properties window for any Capella model element.
As a final note, you may use the HTML files with your favorite browser.
The HTML files are located in CapellaTutorial → ToyCatapult → HTML.
Imagine zipping the HTML folder into a compressed file and e-mailing to other members of your team. They do not need to have Capella
installed to be able to view your model in great detail.
Follow these steps to share your Capella model with a fellow Capella user.
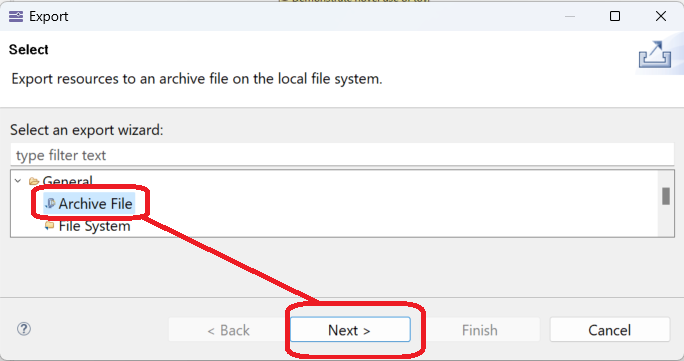
Click File → Export:
and select General → Archive File. Then click Next.
Select the ToyCatapult folder , then click Browse to specify a location and file name to use. I choose "ToyCatapultExport.zip". Click Finish.
E-mail the resulting file to a fellow Capella user. Steps for importing a Capella model are in the next section.
Follow these steps to import a Capella model shared with you from a fellow Capella user.
This section assumes you are using the same version of Capella used to create the model.
There may be additional model migration steps required if your version is more recent.
Download a copy of the Toy Catapult compressed file by clicking on this link:
ToyCatapultExport.zip
Note: this model was created using Capella v6.0. If you have a more recent version of Capella, you may need to migrate the model. Please refer to Capella documentation for migration instructions.
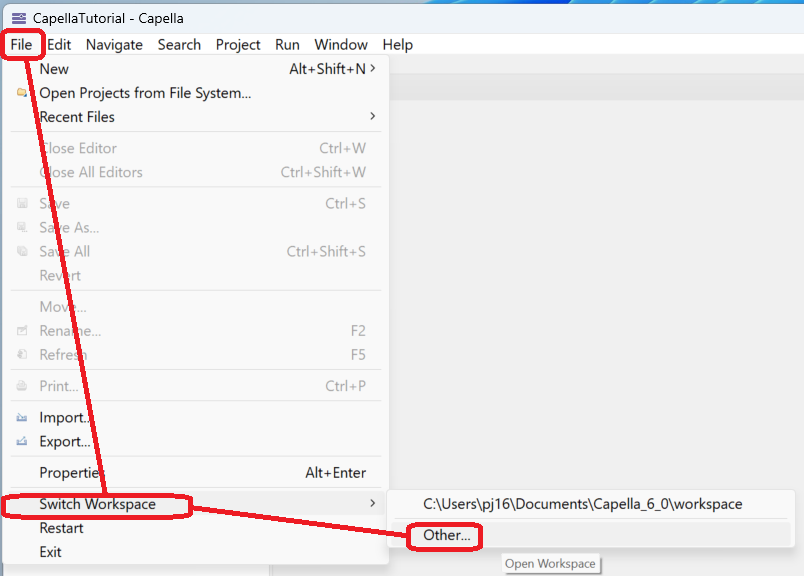
To avoid confusing the imported model with the original model, let's open a new workspace.
Click File → Switch Workspace → Other.
Click Browse and navigate to a new folder. (I created a folder called "ToyCatapultImport" for use as a new workspace.) Then click Launch.
Capella will close and then re-open using this new workspace. You may see a welcome page which you should delete for the next step.
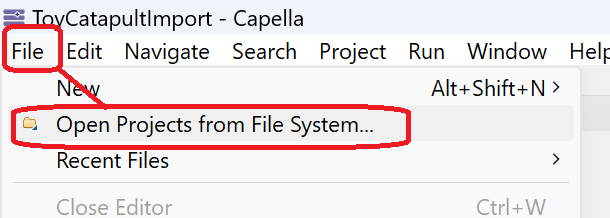
In the new workspace, click File → Open Projects from File System.
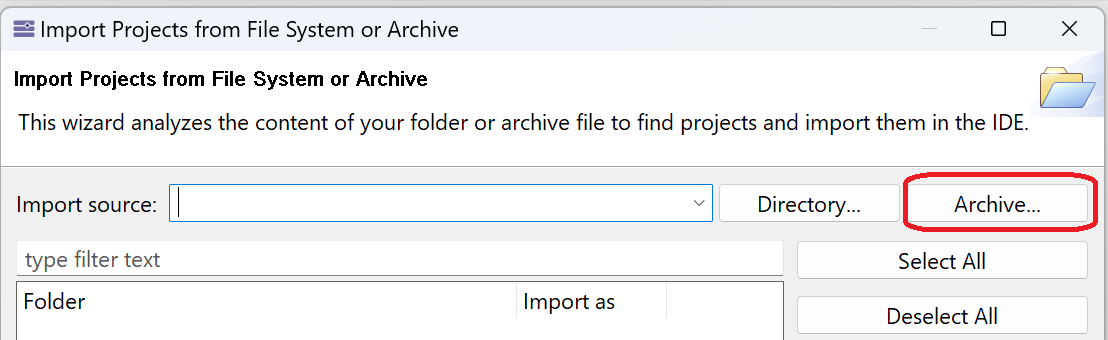
Click Archive in the import dialog.
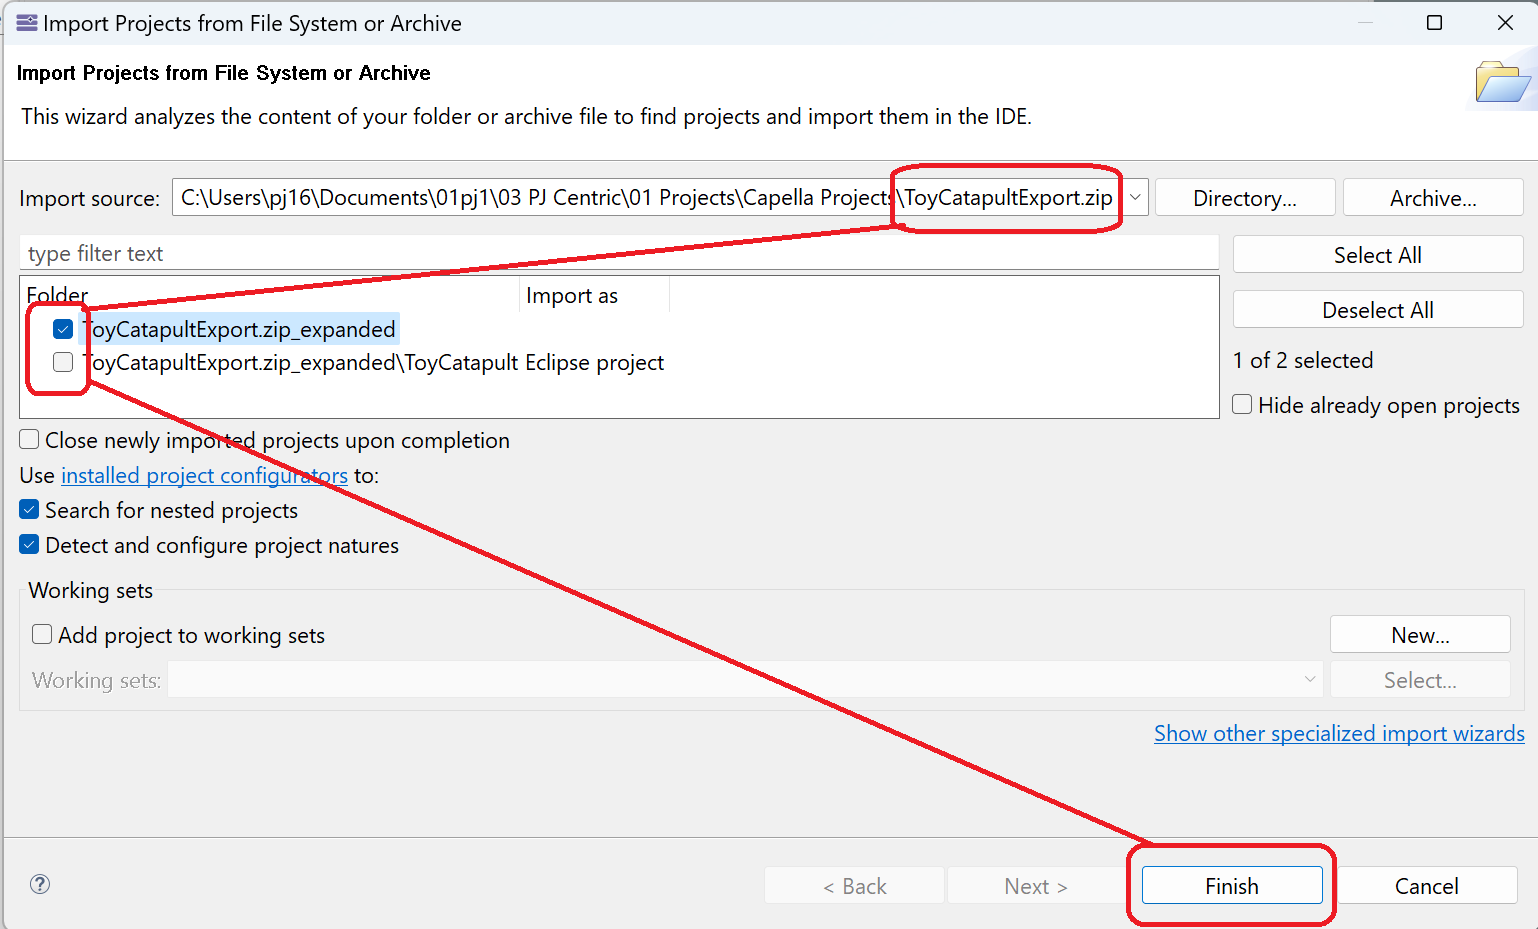
Navigate to the downloaded archive file "ToyCatapultExport.zip" and click Open.
Back in the import dialog, if there are multiple models, select only the first one and click Finish.
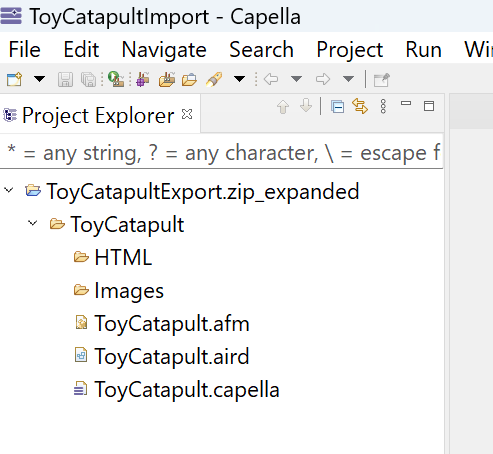
If this step was successful, you will see a model loaded into the Project Explorer.
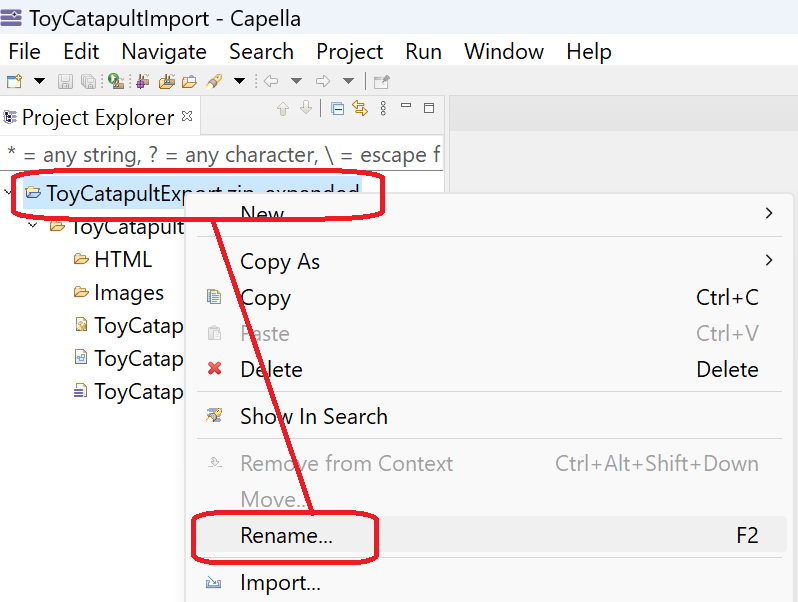
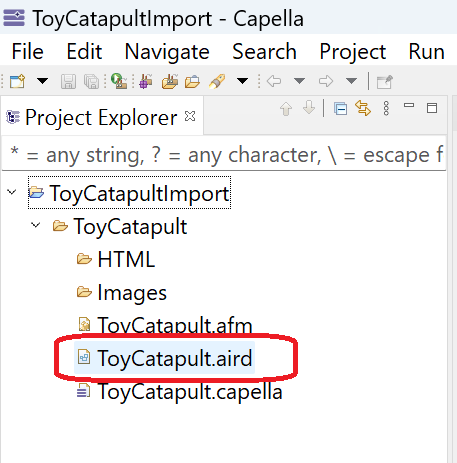
I chose to rename the master folder to "ToyCatapultImport":
Double-click on the "ToyCatapult.aird" component. This should complete the load process.
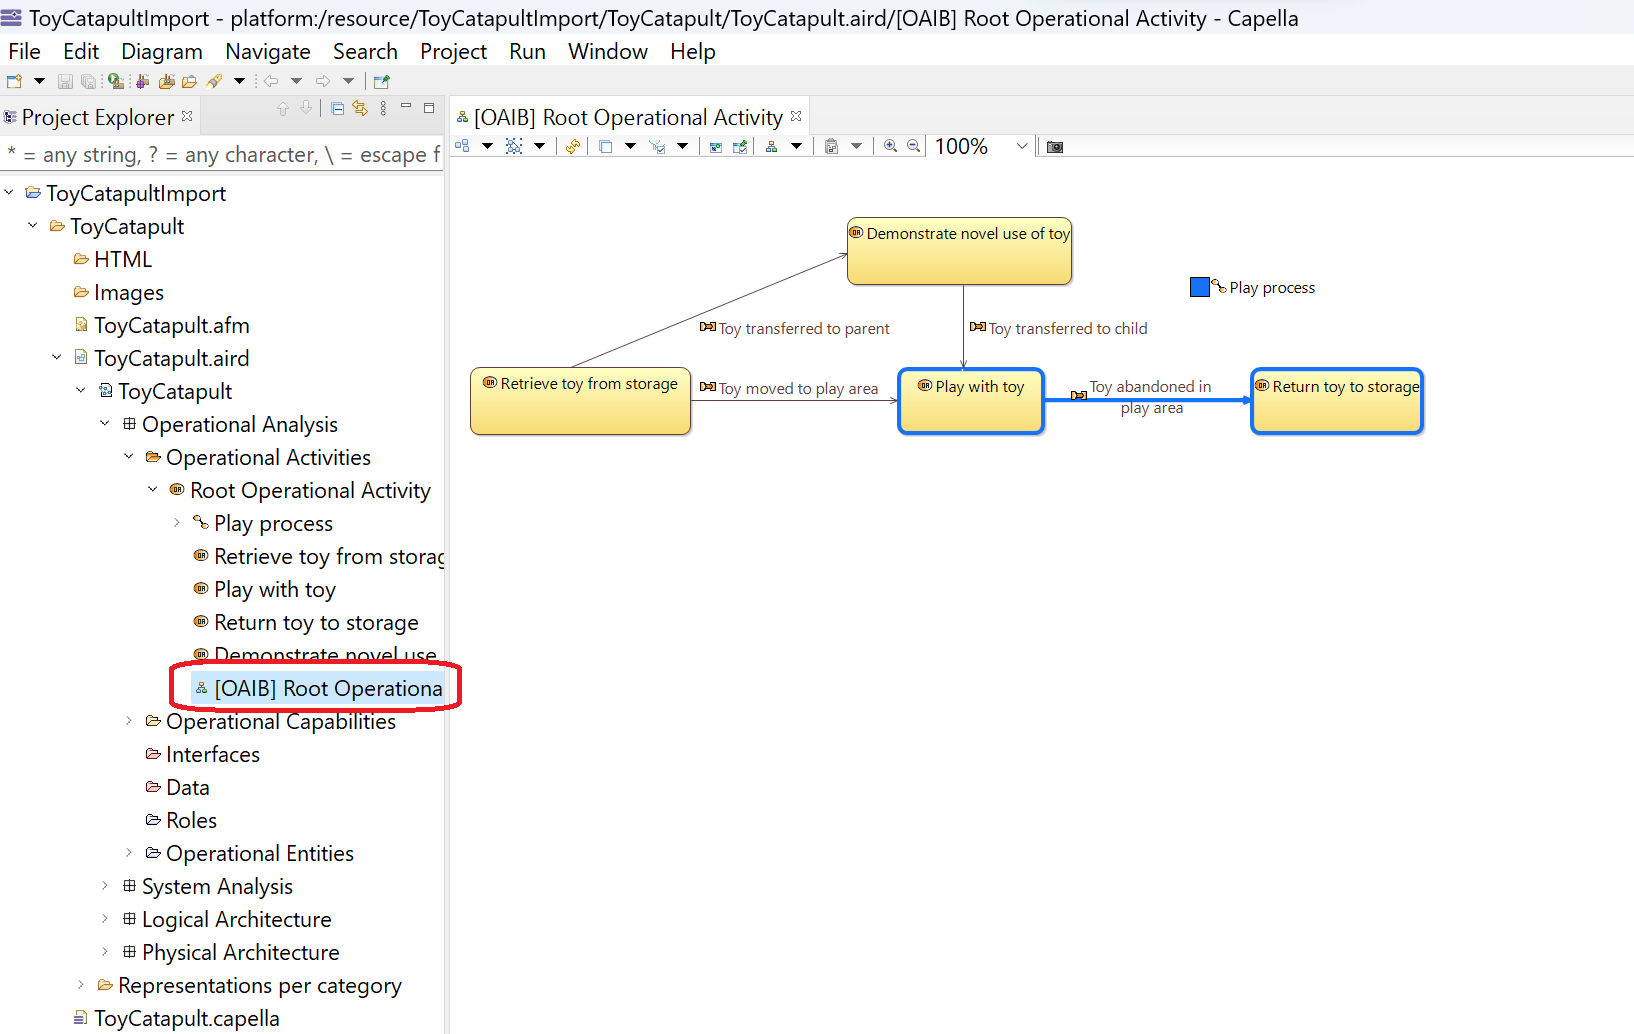
To verify that you have received a full copy of the Toy Catapult model, double-click on the "[OAIB} Root Operational Activity" diagram.
If this is what you see, then we have successfully shared a model with each other.
A goal-seeking system is one that can respond differently to different events in the same or a different environment until it produces a particular outcome. Production of this state is its goal. Such a system has a choice of means but not of ends. It is responsive rather than reactive. Response is voluntary, reaction is not.
A purposeful system is one that can produce not only the same outcomes in different ways in the same environment, but also diifferent outcomes in both the same and different environments. It can change its ends under constant conditions. This ability to change its ends under constant conditions is what exemplifies free will. Such systems not only learn and adapt, they can also create.
Gharajedaghi, J. (2011). Systems thinking: Managing chaos and complexity: A platform for designing business architecture. Elsevier.
 Name the folder as Images.
 We will use the Images folder to locate our diagrams as images.

 Double-click on any entry in the folder to view the image.
 and click on Download. Choose Dropin of the latest version.
 Unzip the downloaded file:
 Right-click on the extracted folder and copy the folder.
 Open Capella_6_0 → dropins folder (or your current Capella installation folder and dropins sub-folder) and paste the CapellaXHTMLDocGen folder.


 We will use the HTML folder to locate our HTML files.
 In the pop-up window, browse to the HTML folder; and click Finish.
 This process may take some time.
 The index page will open.
Double-click the window header to maximize its size.
The index page will list the models.
The index page will open.
Double-click the window header to maximize its size.
The index page will list the models.
 Click on the only model in the list, ToyCatapult.
 Notice that the HTML file has a navigation menu on the left, which matches the Project Explorer index in Capella.
Furthermore, notice the Documentation page of the project is used for the top level introduction.
You can add further documentation to model elements by filling the Summary and Description fields in the Properties window for any Capella model element.
Notice that the HTML file has a navigation menu on the left, which matches the Project Explorer index in Capella.
Furthermore, notice the Documentation page of the project is used for the top level introduction.
You can add further documentation to model elements by filling the Summary and Description fields in the Properties window for any Capella model element.
 Imagine zipping the HTML folder into a compressed file and e-mailing to other members of your team. They do not need to have Capella
installed to be able to view your model in great detail.
Imagine zipping the HTML folder into a compressed file and e-mailing to other members of your team. They do not need to have Capella
installed to be able to view your model in great detail.
 and select General → Archive File. Then click Next.
 Select the ToyCatapult folder , then click Browse to specify a location and file name to use. I choose "ToyCatapultExport.zip". Click Finish.

 Click Browse and navigate to a new folder. (I created a folder called "ToyCatapultImport" for use as a new workspace.) Then click Launch.
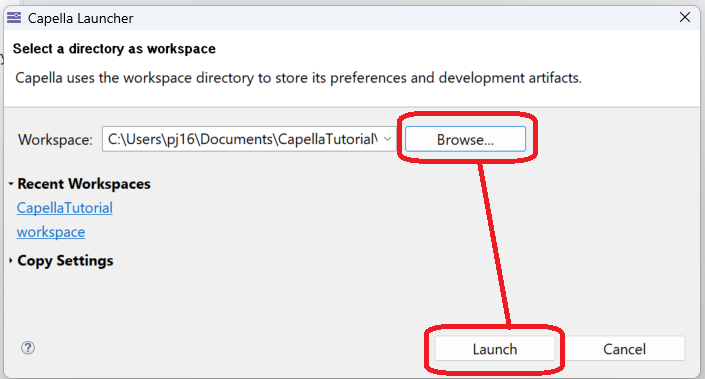 Capella will close and then re-open using this new workspace. You may see a welcome page which you should delete for the next step.
 Click Archive in the import dialog.
 Navigate to the downloaded archive file "ToyCatapultExport.zip" and click
 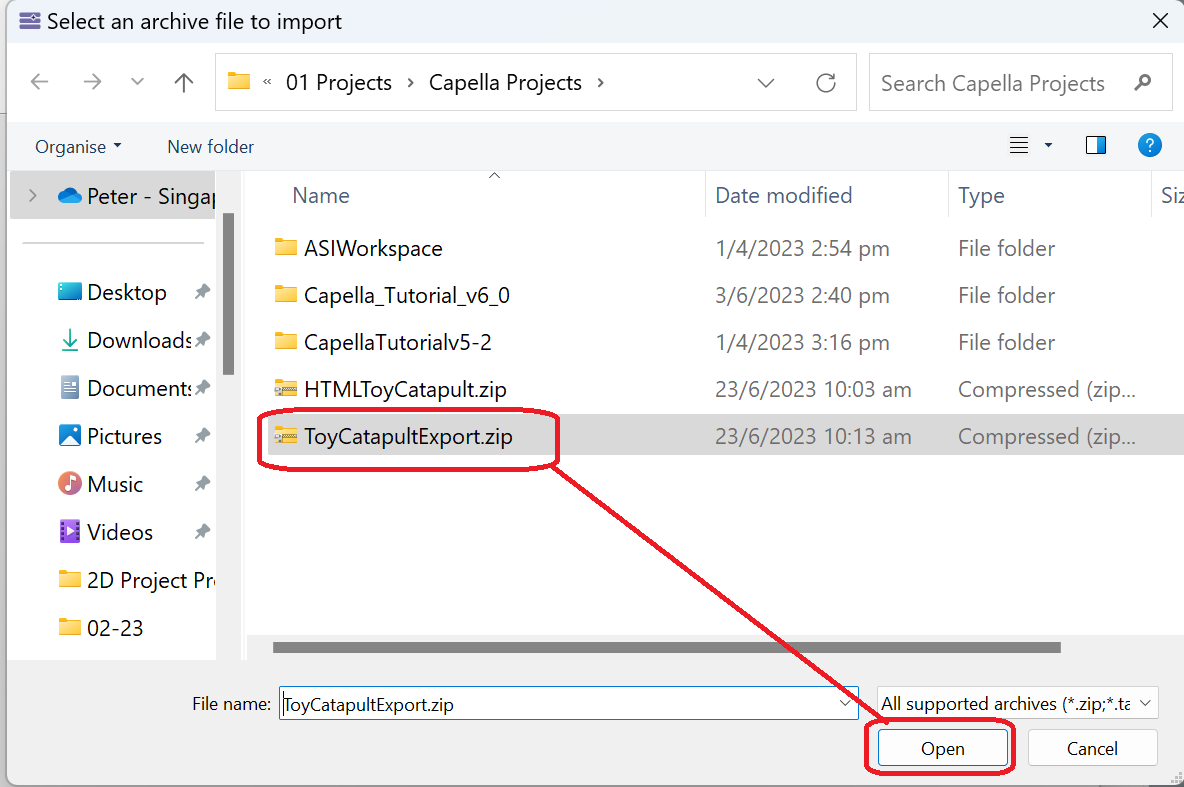 Back in the import dialog, if there are multiple models, select only the first one and click Finish.
 If this step was successful, you will see a model loaded into the Project Explorer.
 If this is what you see, then we have successfully shared a model with each other.