The steps to install Capella are explained in this section.
For further information you may visit the PolarSys help page at
Installation Guide.
Prerequisites
Capella requires a 64-bit operating system. Beginning with Capella 6.0, the Java environment is built into the distribution. There is no need to install Java separately.
This tutorial is based on the 64-bit version Capella 6.0.
Installation Procedure
Visit the Download page of Capella at
Capella Download Page
and click the Get Capella button to download the latest version. This tutorial is based on version 6.0.
You will download a zipped folder (eg: capella-6.0.0.202209090800-win32-win32-x86_64.zip).
Unzip the folder and move the contents to a desired location (eg: "Documents/Capella_6_0".
You may delete the zipped folder after this step.
To run the program, double-click capella.exe in the top folder.
Each time you start Capella, you will be prompted with the following dialogue to select a workspace. We recommend choosing a directory separate from the folder in which you installed Capella.
You may skip this step next time by checking the Use this as the default and do not ask again option.
The workspace is basically a folder where your project files will be stored.
You may have multiple projects in the same workspace.
Note also that you may work on multiple projects simultaneously by starting Capella multiple times on different workspaces.
Create a folder named "CapellaTutorial".
In the dialogue, click Browse and select the "CapellaTutorial" folder you just created as the workspace; then click OK.
Eclipse is a general purpose package for graphical modeling systems. The version we are using has been customized for the Capella system.
As a result, some of the user interface features you will see are common to all Eclipse applications while others are customized to Capella.
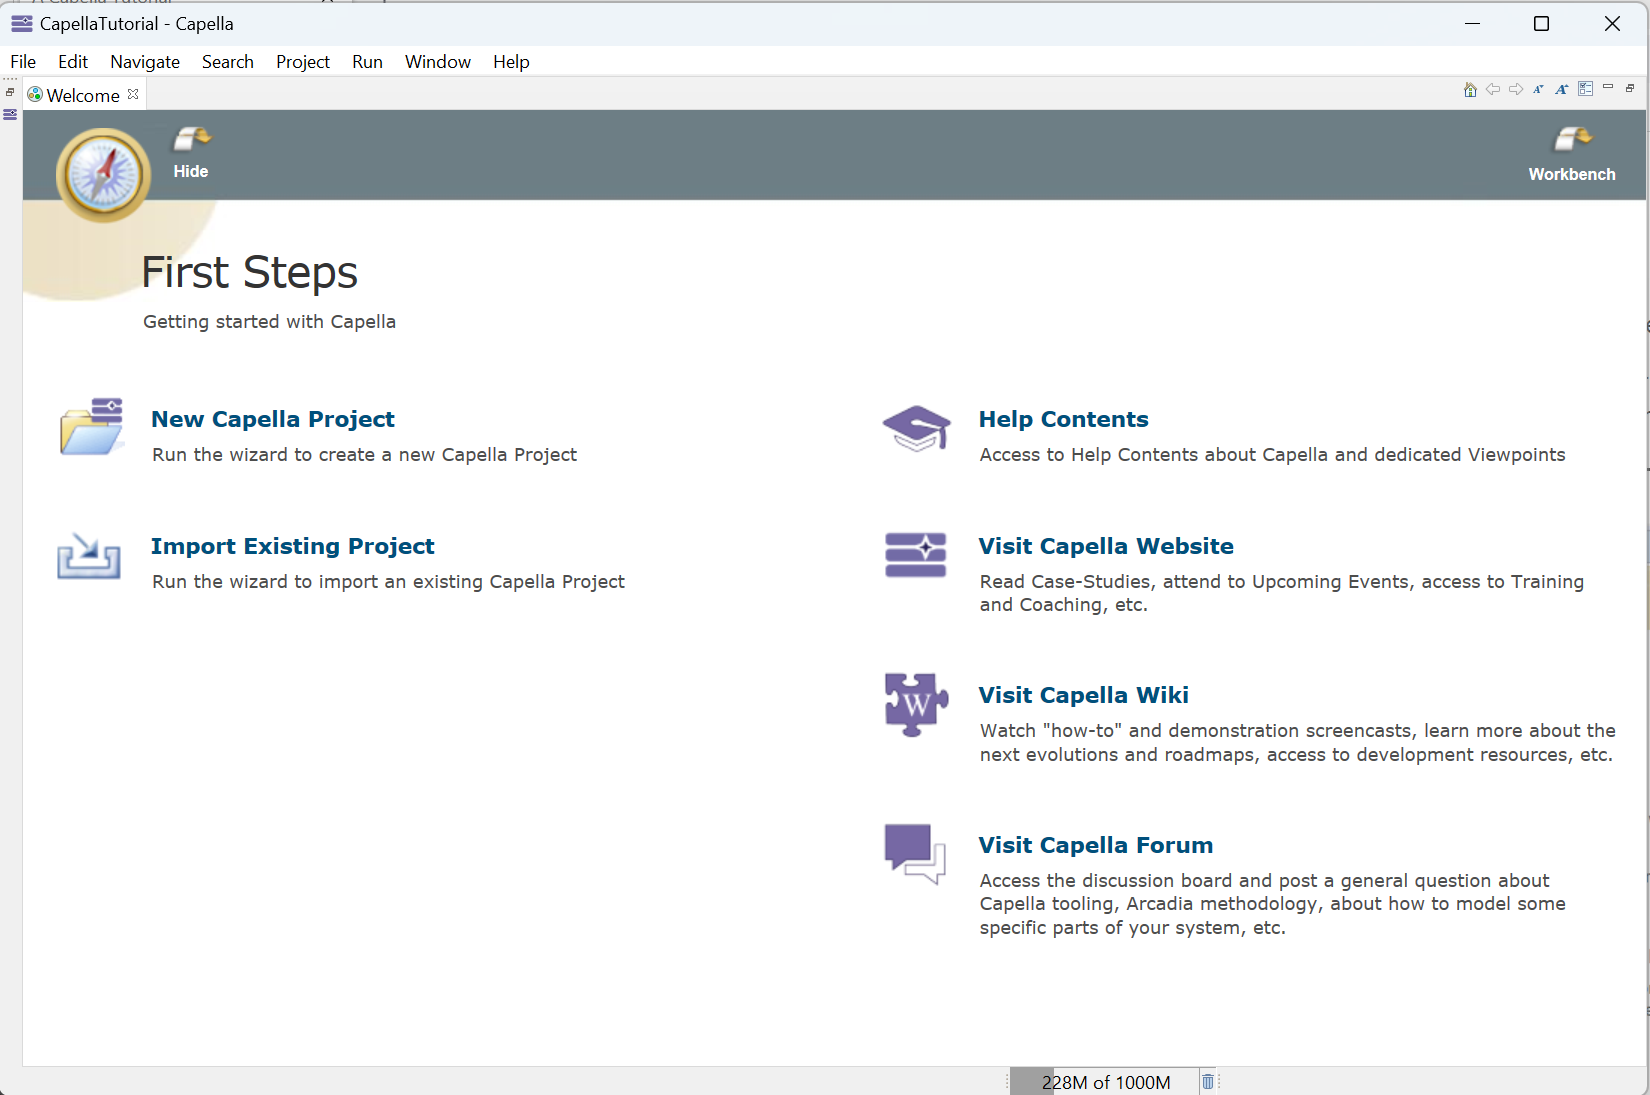
Capella will start with a custom Welcome page.
You may start or import a Capella project, or visit the Capella Wiki or Forum using this page.
We will close this Welcome page and start discovering the user perspective.
Close the Welcome page by clicking the x icon.
You will see the modelling environment, which has no open project yet.
We will focus on and use three main parts of the user interface.
The part designated with A
is the working area where we will build our diagrams and models.
The left-hand-side area designated with B
is the project explorer,
which will allow us to navigate the project objects.
In the area at the bottom designated with C,
we currently see three tabs:
Properties, Information, and
Semantic Browser.
We will not use the Information; hence, we will close it.
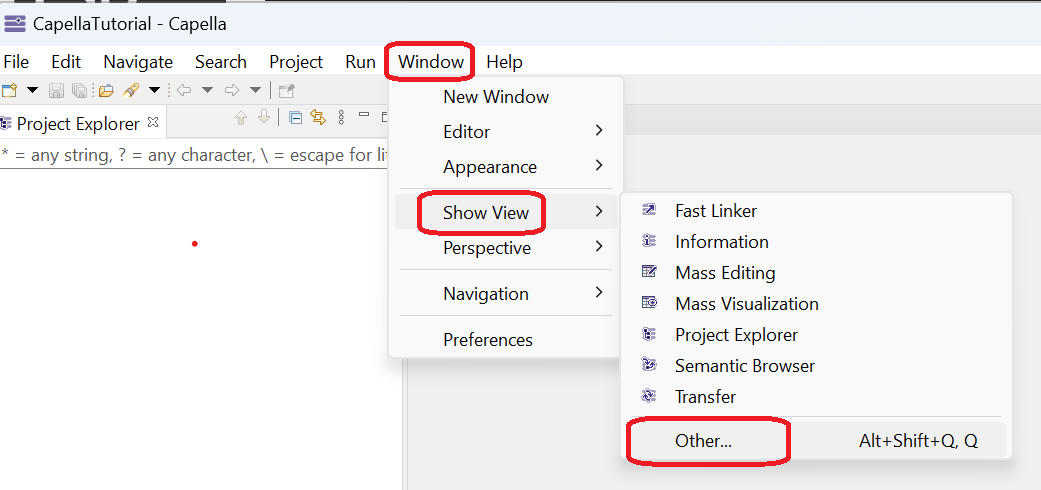
Instead, we will add the Outline view.
Click the x icon next to the Information tab to close the view.
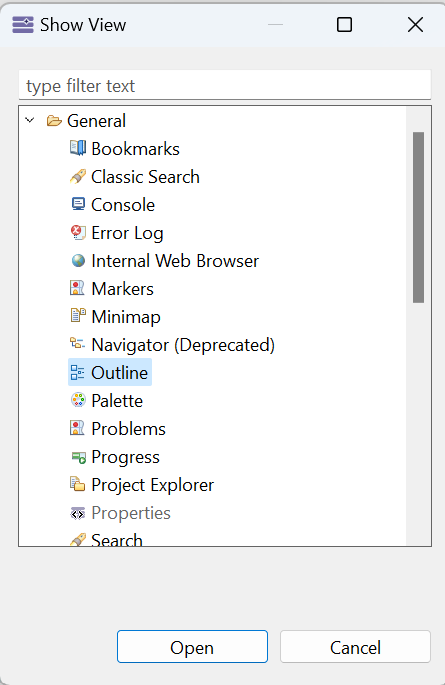
Next, click Window → Show View → Other in the top menu.
Select General → Outline and click OK.
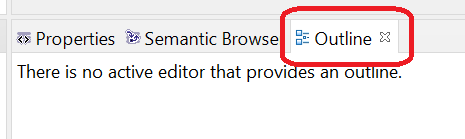
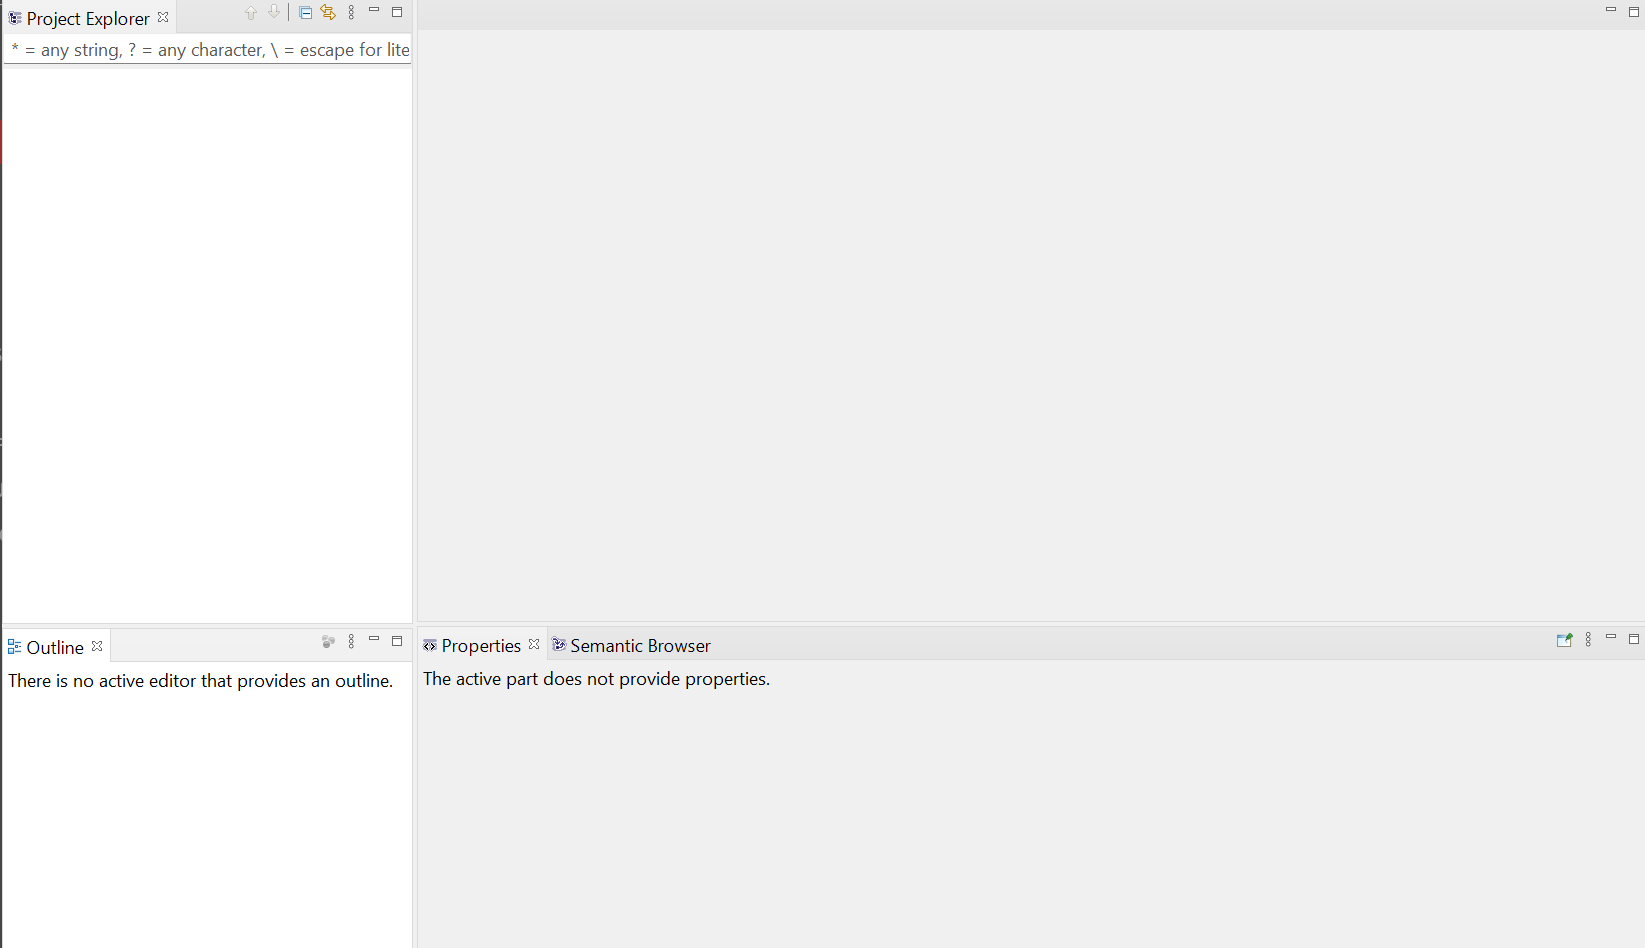
You will see that the view is located within the bottom pane.
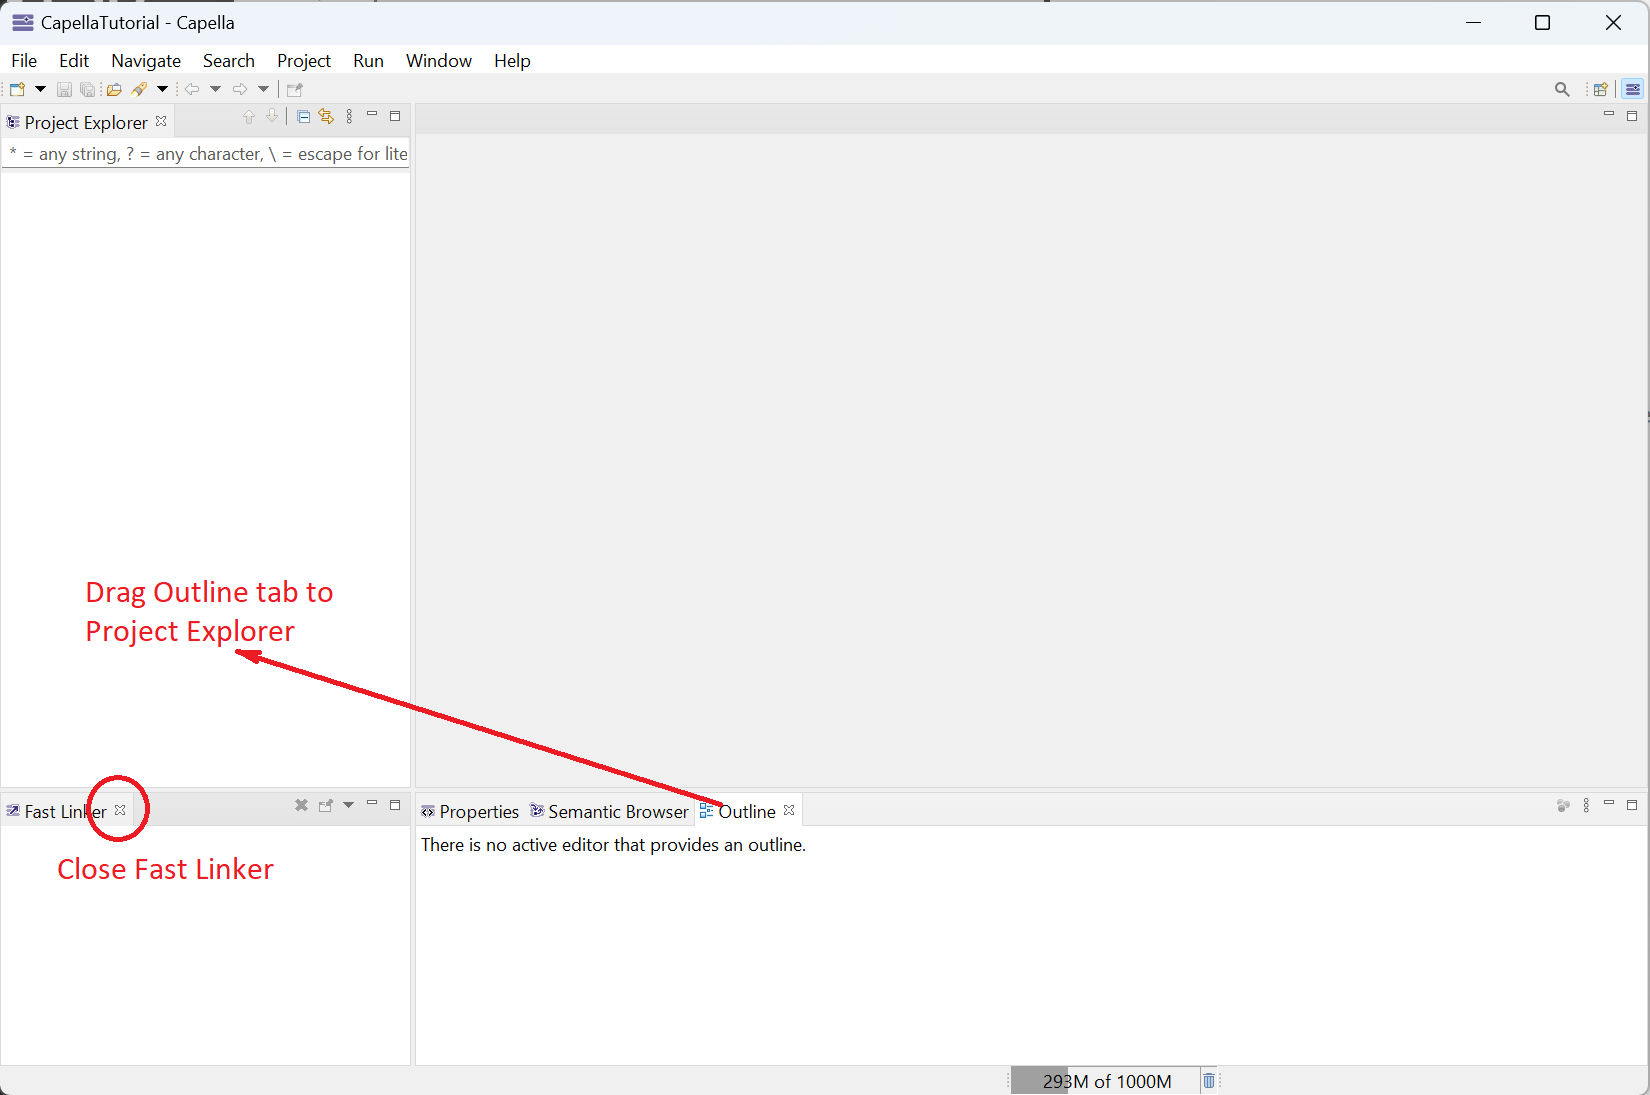
Next, close the FastLinker tab and drag the Outline tab into the Project Explorer tab. The Outline tool is more useful than the FastLinker.
Resize the areas so that they look like this:
We will discuss more of the functionalities of these views as we proceed; however, we have a summary below:
Properties view will display the attributes or properties of any modelling object in focus.
Semantic Browser view will display the relations of the object in view with other modelling objects.
It allows quick navigation to the related objects.
Outline view will display a high-level view of any diagram. It is especially useful when dealing with very large diagrams.
The view allows easy navigation within the diagram.
As a final note, you have seen that Eclipse is flexible in modifying your perspective (show/hide views, resize/relocate views, etc),
and you are free to change the perspective as needed.
Now that we have prepared our user perspective, we are ready to start our new project, all about designing a Toy Catapult.
Click the File → New → Capella Project in the top menu.
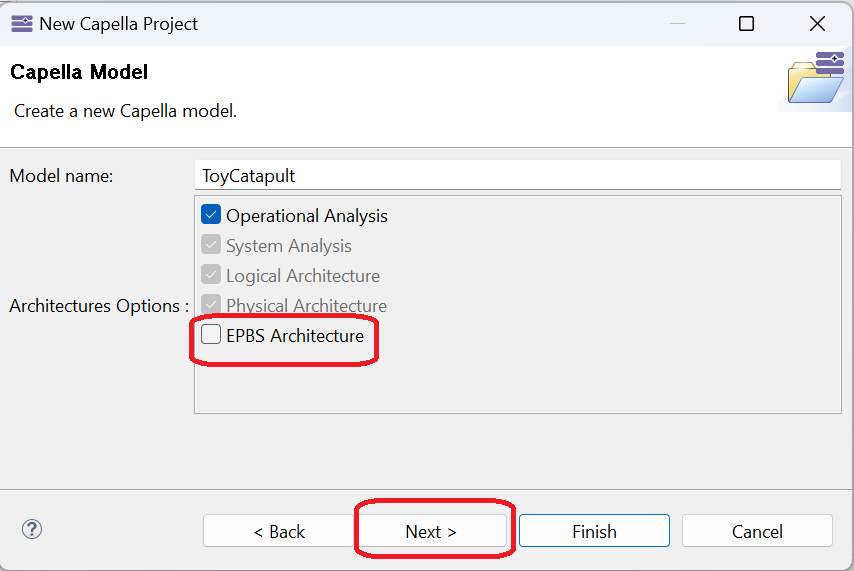
You will be prompted with the following dialogue, where you will enter the name of the project (ToyCatapult) and click "Next".
In the next dialogue, uncheck the box called "EPBS Architecture" because this tutorial will not need it.
In the next dialogue, uncheck the boxes called "EPBS Architecture" and "Physical Architecture" because this tutorial will not need them.
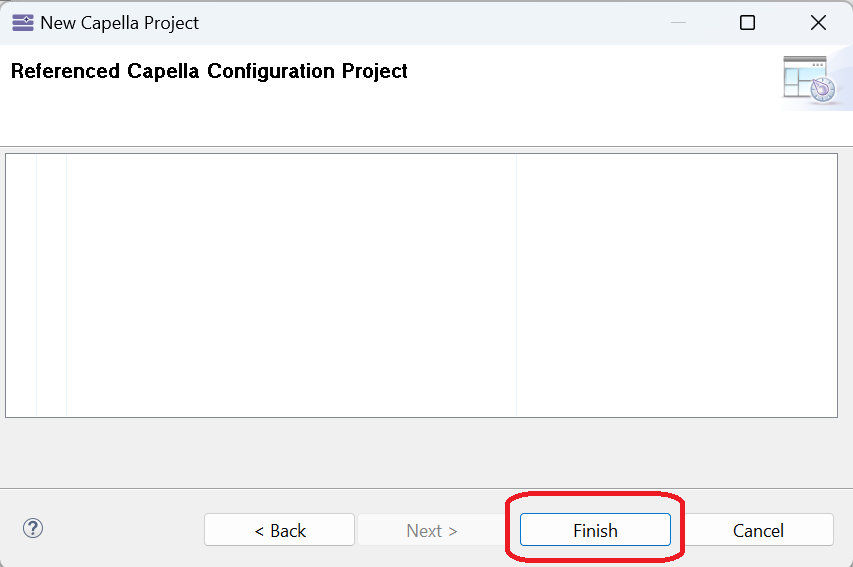
The final dialogue is blank.
Click "Finish". Note that it may take some time until the new project is created.
Once the process is finished, you will see your project in the Capella Project Explorer.
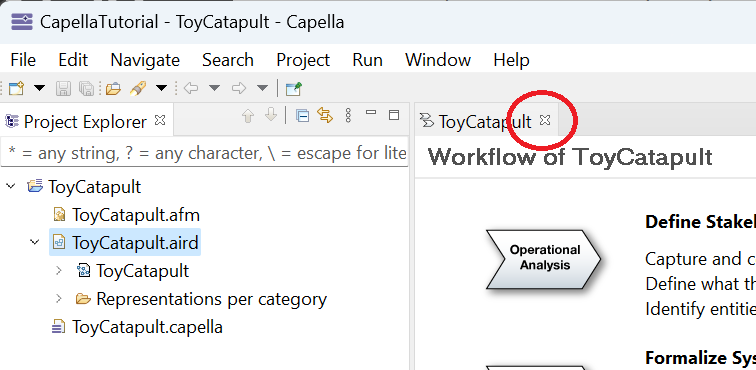
Furthermore, the Workflow of ToyCatapult window will be opened.
Capella Project Explorer
In Capella Project Explorer, you will see files with three different extensions
(afm, aird, capella).
We will be using the ToyCatapult.aird file.
Under ToyCatapult.aird, you will see two folders:
ToyCatapult and Representations per category. As you create diagrams and modeling entities,
they will be placed under these folders automatically and arranged into logical categories.
ToyCatapult.aird → ToyCatapult
Expand the ToyCatapult folder under ToyCatapult.aird.
You will see four subfolders.
Each subfolder corresponds to a different stage of the system design process.
In this tutorial, we will have a different section for each of these stages.
Although we have not defined any object yet,
you may expand these folders to explore the subfolders for a preview of the categories of objects that we will create.
Any object we create during the design process will be located under the appropriate subfolder within the appropriate stage.
We create the objects using diagrams and the allocation is carried out automatically.
ToyCatapult.aird → Representations per category
Next, expand the Representations per category folder under ToyCatapult.aird.
You will observe five subfolders: one for each of three stages, one for common and one for architecture description.
Links to created diagrams will be located under appropriate subfolders with respect to the diagram type,
and of course, under the appropriate design stage. The same diagram will have links to it within the ToyCatapult folder and within the
Representations per category folder.
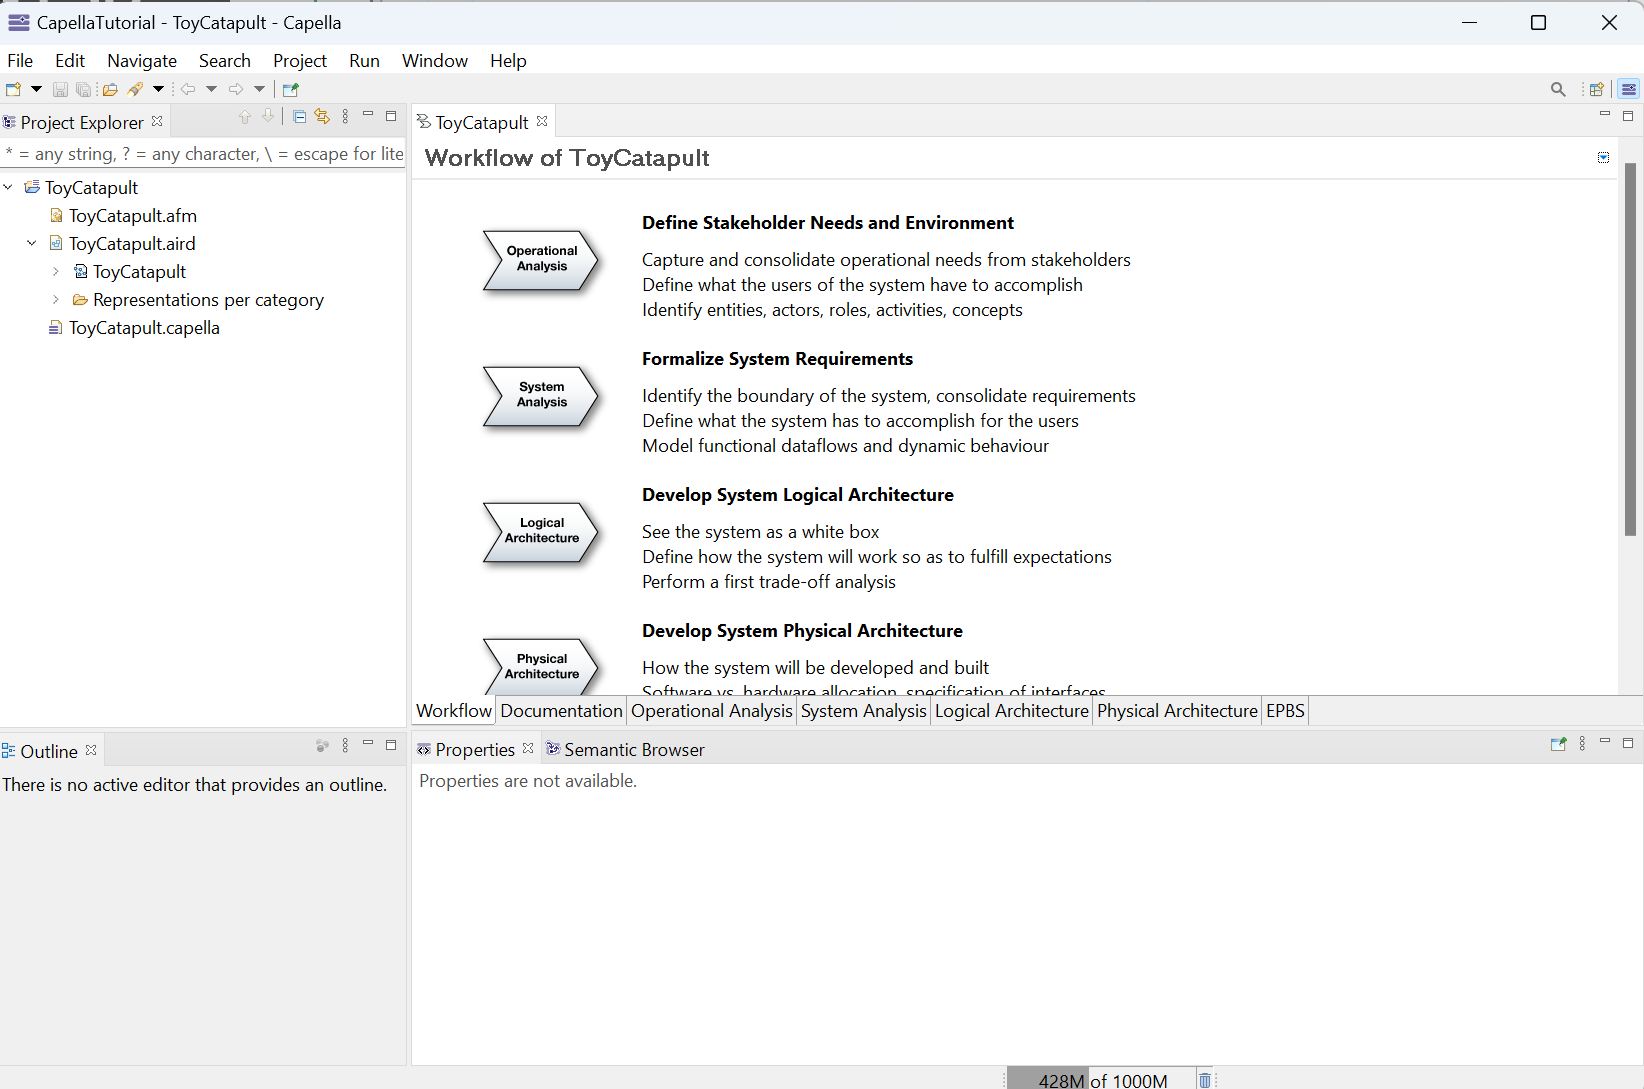
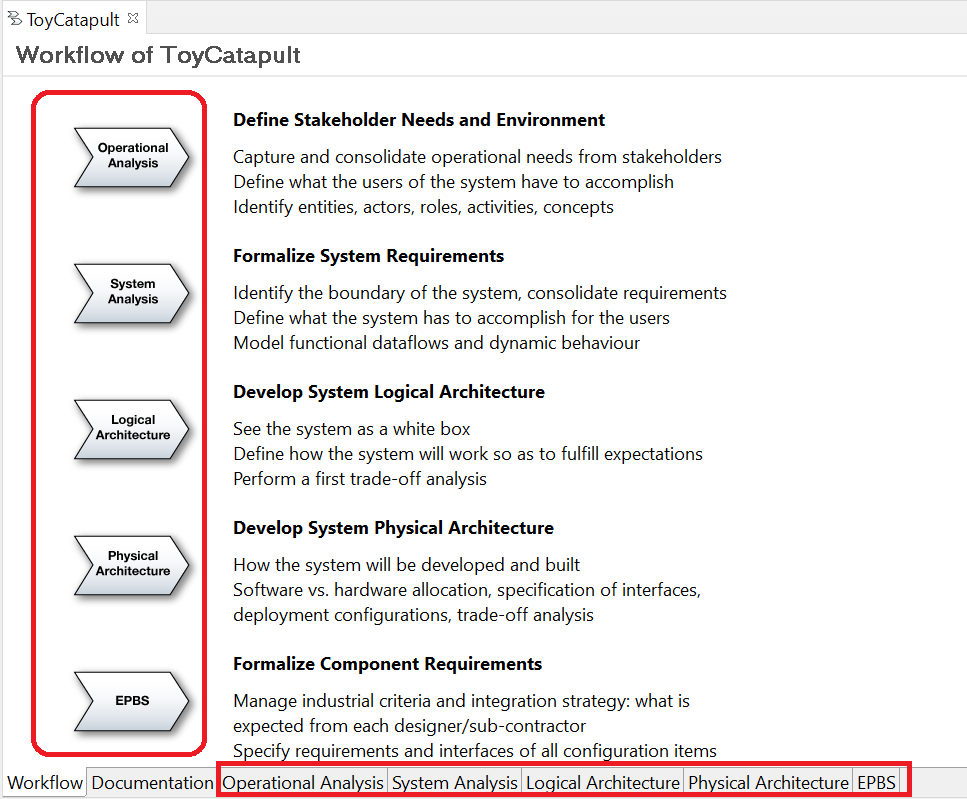
Workflow of ToyCatapult
This window is opened automatically every time you start a new project.
Although it is not essential, the window provides guidance in the suggested order of creating diagrams to define your system.
In this tutorial, we will follow this sequence to some extent.
In case you close the Workflow window, you may reopen it anytime.
Close the Workflow window by clicking the x icon.
Now reopen it by right-clicking ToyCatapult.aird and clicking Open Activity Explorer.
Let us take a closer look to the Workflow of ToyCatapult window.
You will observe a button for each of the five sequential design stages.
Whenever, you click any of these buttons, you will navigate to the page of the corresponding stage.
Alternatively, you may use the tabs at the bottom of the window to navigate.
We will use the first four of these tabs in the following sections (we skip Physical Architecture and EPBS); however,
it would be useful for you to read the brief explanations of the design stages provided in the Workflow tab.
Inquiry is a process that has the aim of augmenting knowledge, resolving doubt or solving a problem.
Research is a kind of inquiry that can be defined as the search for knowledge or as any systematic investigation with an open mind to establish new facts using the scientific method.
Methods tell us how to use techniques in inquiry.
Methodology is the study of methods that are applied in inquiry; it tells us how to use various methods together.
Systems Thinking studies methodologies from a systemic perspective; it tells us how to apply them effectively in inquiry.
Ackoff, R. L., & Pourdehnad, J. (2001). On misdirected systems. Systems Research and Behavioral Science, 18(3), 199-205.


 Select General → Outline and click OK.
 You will see that the view is located within the bottom pane.
 Next, close the FastLinker tab and drag the Outline tab into the Project Explorer tab. The Outline tool is more useful than the FastLinker.
 Resize the areas so that they look like this:
 You will be prompted with the following dialogue, where you will enter the name of the project (ToyCatapult) and click "Next".
 In the next dialogue, uncheck the box called "EPBS Architecture" because this tutorial will not need it.
 In the next dialogue, uncheck the boxes called "EPBS Architecture" and "Physical Architecture" because this tutorial will not need them.
 The final dialogue is blank.
 Click "Finish". Note that it may take some time until the new project is created.
Once the process is finished, you will see your project in the Capella Project Explorer.
Furthermore, the Workflow of ToyCatapult window will be opened.
Click "Finish". Note that it may take some time until the new project is created.
Once the process is finished, you will see your project in the Capella Project Explorer.
Furthermore, the Workflow of ToyCatapult window will be opened.
 Each subfolder corresponds to a different stage of the system design process.
In this tutorial, we will have a different section for each of these stages.
Although we have not defined any object yet,
you may expand these folders to explore the subfolders for a preview of the categories of objects that we will create.
Each subfolder corresponds to a different stage of the system design process.
In this tutorial, we will have a different section for each of these stages.
Although we have not defined any object yet,
you may expand these folders to explore the subfolders for a preview of the categories of objects that we will create.
 Links to created diagrams will be located under appropriate subfolders with respect to the diagram type,
and of course, under the appropriate design stage. The same diagram will have links to it within the ToyCatapult folder and within the
Representations per category folder.
Links to created diagrams will be located under appropriate subfolders with respect to the diagram type,
and of course, under the appropriate design stage. The same diagram will have links to it within the ToyCatapult folder and within the
Representations per category folder.
 Now reopen it by right-clicking ToyCatapult.aird and clicking Open Activity Explorer.

 You will observe a button for each of the five sequential design stages.
Whenever, you click any of these buttons, you will navigate to the page of the corresponding stage.
Alternatively, you may use the tabs at the bottom of the window to navigate.
You will observe a button for each of the five sequential design stages.
Whenever, you click any of these buttons, you will navigate to the page of the corresponding stage.
Alternatively, you may use the tabs at the bottom of the window to navigate.